Peanut Butter Balls Recipe: Chocolate Snap
- Time: Active 15 minutes, Passive 45 minutes, Total 1 hour
- Flavor/Texture Hook: Velvety peanut center with a chocolate snap
- Perfect for: Holiday gifting, party platters, or weekend meal prep
- Mastering the Ultimate Peanut Butter Balls Recipe for Silky Texture
- Precise Specifications for the Perfect Bite and Yield
- The Physics of the Peanut Butter Emulsion
- Selecting the Elements for a Balanced Sweet Filling
- Essential Tools for a Professional Chocolate Dip
- Executing the Roll and Dip with Precision
- Correcting Common Texture Issues and Coating Mistakes
- Exploring Texture Variations and Dietary Ingredient Swaps
- Scaling the Recipe for Large Crowds
- Debunking the Myths of No Bake Candy
- Proper Preservation and Creative Leftover Use Strategies
- Presentation Ideas for Gift Giving and Parties
- Recipe FAQs
- 📝 Recipe Card
Mastering the Ultimate Peanut Butter Balls Recipe for Silky Texture
The first time I attempted a peanut butter balls recipe, I ended up with a literal sticky situation. I hadn't sifted my powdered sugar, and the centers were so gritty they felt like eating sweet sand. The kitchen smelled incredible, like a fresh jar of Jif mixed with warm butter, but the texture was a disaster.
I realized then that while this is a no bake dessert, it still requires the precision of a mastered bake.
Now, whenever I pull a tray of these out of the fridge, the aroma of deep cocoa hitting the salty nut butter reminds me why I love this craft. There is something so satisfying about that first "crack" when your teeth break through the chilled chocolate into the soft, fudge like core.
It is the ultimate comfort food for any true chocolate and peanut butter obsessive, and I have spent years tweaking the ratios to get it just right.
We are going for a specific balance here. Not too oily, not too sweet, and definitely not crumbly. This version uses graham cracker crumbs for a subtle crunch and structural integrity that keeps the balls from sagging into puddles.
If you have ever struggled with chocolate sliding off the filling or centers that melt the moment you touch them, you are in the right place to master this technique.
Precise Specifications for the Perfect Bite and Yield
Before we get into the mixing bowl, let's look at how this recipe performs under different conditions. Whether you are looking for a quick snack or a classic holiday centerpiece, knowing the texture outcome is vital.
This is especially helpful if you are deciding between this version and a "fast" version that might skip the chilling steps.
| Texture Profile | Preparation Time | Stability Level | Best Use Case |
|---|---|---|---|
| Classic (Chilled) | 1 hour | High - stays firm | Gift boxes and parties |
| Fast (No Chill) | 20 minutes | Low - prone to melting | Immediate home snacking |
| Extra Crunchy | 25 minutes | Medium - very textured | Texture lovers |
The "classic" route is what we are mastering today. By allowing the fats in the butter and peanut butter to properly hydrate the graham cracker crumbs and then set in the cold, we create a stable emulsion. This ensures the chocolate coating adheres perfectly without slipping.
The Physics of the Peanut Butter Emulsion
Fat Saturation: The powdered sugar acts as a desiccant, pulling moisture from the butter and peanut butter to create a semi solid fudge state. This prevents the oil from separating even at room temperature.
Structural Reinforcement: Graham cracker crumbs provide a fibrous network that traps the lipids, ensuring the balls maintain their spherical shape during the dipping process.
Viscosity Modification: Adding coconut oil to the chocolate chips lowers the surface tension, allowing for a thinner, professional grade coating that shatters upon impact.
Selecting the Elements for a Balanced Sweet Filling
To achieve a professional result, every ingredient in this peanut butter balls recipe must serve a specific purpose. I always recommend using a standard creamy peanut butter like Jiffy or Skippy rather than a "natural" stir style variety.
The stabilizers in commercial peanut butter are actually your best friend here, as they provide a consistent texture that natural oils can't match.
- 1.5 cups creamy peanut butter: Provides the base flavor and fat. Why this? Commercial brands offer the best emulsifiers for a smooth, non greasy finish.
- 0.5 cup unsalted butter, softened: Adds a rich, creamy mouthfeel. Why this? Unsalted allows you to control the exact seasoning with sea salt.
- 2 cups graham cracker crumbs: Gives the filling structure and a slight crunch. Why this? They absorb excess oil better than oat flour or flour.
- 3 cups powdered sugar, sifted: Sweetens and thickens the mixture. Why this? Sifting is mandatory to avoid a gritty, sandy texture.
- 1 tsp pure vanilla extract: Enhances the nutty notes. Why this? Adds a floral aroma that cuts through the heavy fats.
- 0.25 tsp fine sea salt: Balances the sugar. Why this? Fine salt dissolves instantly, preventing salty "hot spots" in the filling.
- 2 cups semi sweet chocolate chips: The outer shell. Why this? Semi sweet provides a bitter contrast to the sugary interior.
- 1 tbsp coconut oil: Thins the chocolate. Why this? Creates a glossy finish and a better "snap" once chilled.
| Ingredient | Science Role | Pro Secret |
|---|---|---|
| Creamy Peanut Butter | Primary Emulsifier | Use room temperature for easier mixing |
| Powdered Sugar | Texture Stabilizer | Sift twice for a melt in-the mouth feel |
| Coconut Oil | Melting Point Regulator | Prevents the chocolate from blooming (whitening) |
If you find yourself enjoying the combination of these flavors, you might also like my Chocolate Peanut Butter recipe which uses similar profiles in a breakfast format. It’s a great way to use up any leftover peanut butter from this bake.
Essential Tools for a Professional Chocolate Dip
You don't need a high end pastry kitchen, but a few specific tools make the process much cleaner. I highly recommend using a small cookie scoop (about 1 tablespoon size). It ensures every single ball is identical, which isn't just about aesthetics it means they all chill and set at the same rate.
A double boiler is the safest way to melt chocolate, but a microwave works if you are careful. If using a microwave, use a glass bowl as it retains heat more evenly than plastic. You will also want a couple of forks or a dedicated dipping tool.
Personally, I use a plastic fork with the two middle tines snapped off; it creates a perfect "cradle" for the balls and lets the excess chocolate drip away quickly.
Finally, clear some space in your freezer. You will need a flat surface for the baking sheet. I’ve made the mistake of trying to tilt a tray into a crowded freezer, only to have thirty peanut butter balls slide into a giant, sticky heap at the bottom. Trust me, do the "freezer shuffle" before you start mixing.
Executing the Roll and Dip with Precision

1. Create the Base
Cream the 1.5 cups creamy peanut butter and 0.5 cup softened butter in a stand mixer until pale and fluffy. This should take about 2 minutes. You’ll notice the aroma changes from just "peanuts" to a more complex, buttery scent.
2. Add the Aromatics
Mix in 1 tsp vanilla extract and 0.25 tsp fine sea salt. Note: Adding salt at this stage ensures it incorporates into the fats before the dry ingredients go in.
3. Incorporate the Structure
Slowly add 3 cups sifted powdered sugar and 2 cups graham cracker crumbs on low speed. Cook until a stiff dough forms that pulls away from the sides of the bowl. It should feel like slightly oily play dough.
4. Shape the Centers
Scoop 1 tablespoon portions and roll them between your palms until perfectly smooth and spherical. If the warmth of your hands makes them too soft, pop the bowl in the fridge for 10 minutes.
5. The First Chill
Place the balls on a parchment lined tray and freeze for 30 minutes. Wait until they feel firm to the touch. This is the most important step for a clean chocolate finish.
6. Melt the Coating
Combine 2 cups chocolate chips and 1 tbsp coconut oil in a bowl. Microwave in 30 second bursts, stirring in between, until the mixture is glossy and liquid. You should smell a rich, toasted cocoa aroma.
7. The Rapid Roll Technique
Drop one chilled ball into the chocolate, roll it to coat, and lift it out with your dipping tool. Tap the tool against the side of the bowl until the excess chocolate stops dripping.
8. The Final Set
Place the coated balls back on the parchment. Wait 15 minutes at room temperature or 5 minutes in the fridge until the shell is matte and firm.
Chef's Tip: To get that professional "swirl" on top, let a tiny bit of chocolate drizzle from your fork as you pull it away from the finished ball.
For those who love a bit of a bake with their chocolate, these pair beautifully with a Chewy Chocolate Chip recipe. The contrast between the soft cookie and the snappy peanut butter ball is a real crowd pleaser on a dessert tray.
Correcting Common Texture Issues and Coating Mistakes
The Filling Is Grainy
If your centers feel like they have grit in them, the culprit is almost always the powdered sugar. Even if the bag says "no clump," the sugar can hydrate unevenly. To fix this, you can try adding a teaspoon of heavy cream and beating the mixture vigorously, but the real solution is preventative: always sift your sugar through a fine mesh strainer.
The Chocolate Is Seizing
If your chocolate turns into a thick, clumpy paste, a drop of water or steam likely got into the bowl. Chocolate is an emulsion of cocoa solids and fats; water breaks that emulsion. To save it, you can sometimes stir in a teaspoon of vegetable oil or more coconut oil, but often it's best to start over.
Ensure your bowls and spatulas are bone dry.
| Problem | Root Cause | Solution |
|---|---|---|
| Balls are flattening | Mixture is too warm | Chill the dough for 20 mins before rolling |
| Chocolate is cracking | Coating set too fast | Add 1 tsp more coconut oil to the melt |
| Oily residue on tray | Poorly mixed fats | Cream the butter and PB for longer at the start |
Common Mistakes Checklist
- ✓ Don't use "natural" peanut butter; the oil separation will prevent the balls from holding their shape.
- ✓ Ensure the butter is truly softened (room temp), not melted, or the filling will be greasy.
- ✓ Never skip the freezing step before dipping; a warm ball will melt into your chocolate.
- ✓ Use a deep, narrow bowl for the chocolate to make dipping easier and more efficient.
- ✓ Avoid over handling the balls once rolled; the heat from your hands will soften the fats.
Exploring Texture Variations and Dietary Ingredient Swaps
While the original peanut butter balls recipe is a classic for a reason, you can easily adapt it for different needs. If you want a more rustic feel, you can try a Peanut Butter Balls Recipe with Oats. Simply swap the graham cracker crumbs for 1.5 cups of quick rolled oats.
The texture will be heartier and chewier, which some people prefer for a mid day energy boost.
For a Healthy Peanut Butter Balls Recipe approach, you can substitute the powdered sugar with a mix of maple syrup and coconut flour, though the texture will be significantly softer. If you go this route, you must keep them stored in the freezer at all times.
| Original Ingredient | Substitute | Why It Works |
|---|---|---|
| Graham Crackers | Digestive Biscuits | Similar crunch and salt to sweet ratio |
| Semi Sweet Chips | Dark Chocolate (70%) | Cuts the sweetness for a more "adult" flavor |
| Coconut Oil | Vegetable Shortening | Provides a similar snap and shine to the shell |
If you find yourself with extra graham crackers, they are the perfect base for a Custard Bread Pudding recipe. You can use the crushed crumbs as a topping for an extra layer of texture.
Scaling the Recipe for Large Crowds
When you need to double this peanut butter balls recipe for a big holiday party, the math is straightforward, but the physics change. Doubling the ingredients to 3 cups of peanut butter and 6 cups of sugar is fine, but you will find that the mixture gets very heavy.
A hand mixer might struggle, so a heavy duty stand mixer is your best friend here.
For a half batch (15 servings), simply divide everything by two. Since we aren't using eggs, you don't have to worry about the "half egg" dilemma. Just ensure you still use the full teaspoon of vanilla to keep that aroma strong.
- Scaling Up (2x): Use a larger bowl and chill the dough in two separate batches so it cools evenly.
- Scaling Down (0.5x): Use a smaller bowl for the chocolate dip so you still have enough depth to submerge the balls.
Debunking the Myths of No Bake Candy
One common misconception is that you need "tempered" chocolate for these. While tempering gives the best shine, it is incredibly difficult for a home cook. Using coconut oil is a "cheat" that mimics the properties of tempered chocolate without the thermometer stress.
It lowers the melting point just enough to give you that clean snap.
Another myth is that you can't use a Peanut Butter Balls Recipe with Graham Crackers if you have a gluten sensitivity. There are excellent gluten-free graham cracker brands available that behave exactly like the wheat based ones.
The starch content is what matters for the structure, not the gluten itself.
Proper Preservation and Creative Leftover Use Strategies
Storage is where many people go wrong. These should never be stored at room temperature for long periods. The high fat content means they will soften, and the chocolate might develop "bloom" those harmless but ugly white streaks.
Storage Guidelines:Fridge: Keep in an airtight container for up to 2 weeks. Place parchment paper between layers to prevent sticking. Freezer: These freeze beautifully for up to 3 months. I actually prefer eating them straight from the freezer for maximum snap.
Zero Waste Tips: Don't throw away that leftover dipping chocolate! Stir in some extra crushed graham crackers or some peanuts to make "croquant" clusters. You can also drizzle the leftover chocolate over a batch of brownies. If you're looking for a great brownie base, my Fudgy Brownie Recipe is the perfect companion for that extra chocolate.
Presentation Ideas for Gift Giving and Parties
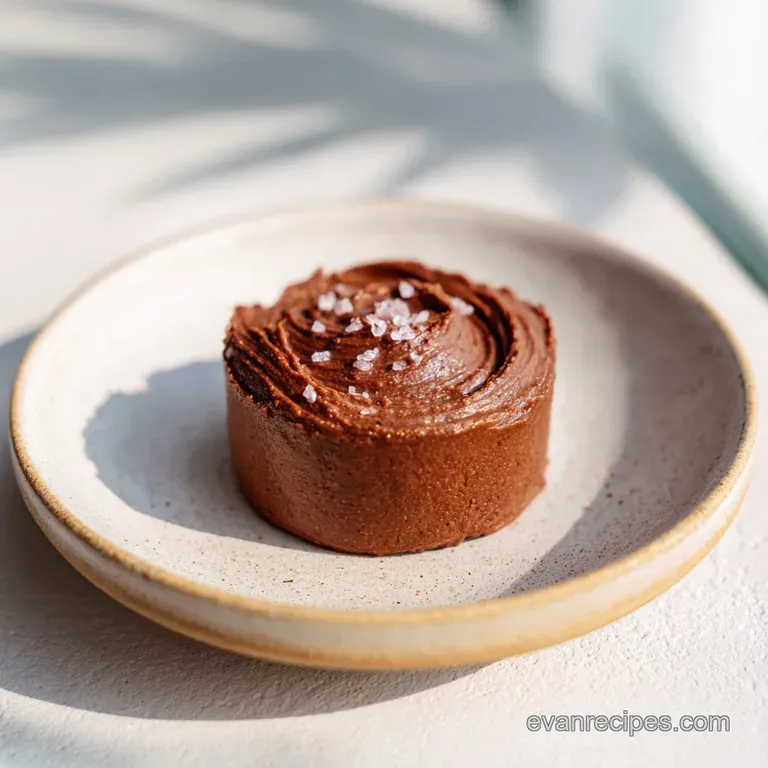
When it comes to serving, these balls look best when they have a bit of personality. You can top them with a tiny pinch of flaky sea salt right after dipping while the chocolate is still wet. This not only looks professional but the salt crystals enhance the peanut aroma the moment someone opens the box.
For a festive look, try using different chocolate drizzles. A white chocolate drizzle over the dark shell creates a beautiful contrast. You can also roll them in crushed peanuts or sprinkles before the coating sets. If you are gifting them, place each ball in a small paper candy liner (the kind used for truffles).
It prevents them from rolling around and makes the experience feel like a high end chocolate shop delivery.
One of my favorite ways to serve these is alongside a warm cup of coffee. The heat from the drink slightly softens the center as you eat, creating a molten like experience that is absolutely divine.
Whether it's a casual Tuesday or a big holiday bash, this mastered peanut butter balls recipe will always be the first thing to disappear from the table. Trust your measurements, sift that sugar, and enjoy the process!

Recipe FAQs
How do you make Paula Deen's peanut butter balls?
Mix creamy peanut butter, softened butter, and sifted powdered sugar with graham cracker crumbs. Roll the stiff dough into balls, chill them until firm, and then dip them in melted semi sweet chocolate mixed with coconut oil for a good snap.
How do you make peanut butter balls for school?
Ensure the centers are fully chilled and firm before dipping them in chocolate. This prevents the filling from melting or squishing when handled by younger children, which is a key difference from standard home baking.
If you enjoyed mastering the texture control in this recipe, see how the same principle of balancing fat and structure applies when you are working on a [Quick Fruit Smoothie Recipe with Strawberry and Banana for Kids: 5 Min].
Are peanut butter protein balls good for you?
No, traditional peanut butter balls are a dessert, not a health food. They are very high in sugar and saturated fats due to the powdered sugar and butter content. For a healthier option, swap the sugar for a sugar substitute and add a scoop of unflavored protein powder to the filling.
Do you need to refrigerate peanut butter balls?
Yes, refrigeration or freezing is necessary for best texture and safety. While the centers are safe at room temperature briefly, chilling keeps the chocolate shell firm and prevents the high fat filling from softening or weeping.
What is the secret to making the chocolate coating stick without slipping?
The peanut butter centers must be completely frozen or very firm before dipping. If the cold ball hits the warm chocolate, the rapid temperature change causes the chocolate to set immediately around the filling, creating a perfect bond.
Is it true you must temper chocolate for a shiny, non-streaky finish?
No, this is a common misconception for home recipes. Tempering is complex; you can achieve a hard, glossy finish by adding about one tablespoon of coconut oil or vegetable shortening to your melted chocolate chips. This lowers the setting temperature for a clean "snap" without the thermometer.
How do you keep the peanut butter filling from being too greasy?
Use graham cracker crumbs to absorb the excess fat and structure the mixture. Ensure your butter is softened, not melted, and cream it thoroughly with the peanut butter before adding the dry ingredients; this aeration helps lighten the final texture.
Peanut Butter Balls Recipe
Ingredients:
Instructions:
Nutrition Facts:
| Calories | 232 kcal |
|---|---|
| Protein | 3.7 g |
| Fat | 13.1 g |
| Carbs | 26.3 g |
| Fiber | 1.2 g |
| Sugar | 20.8 g |
| Sodium | 118 mg |
