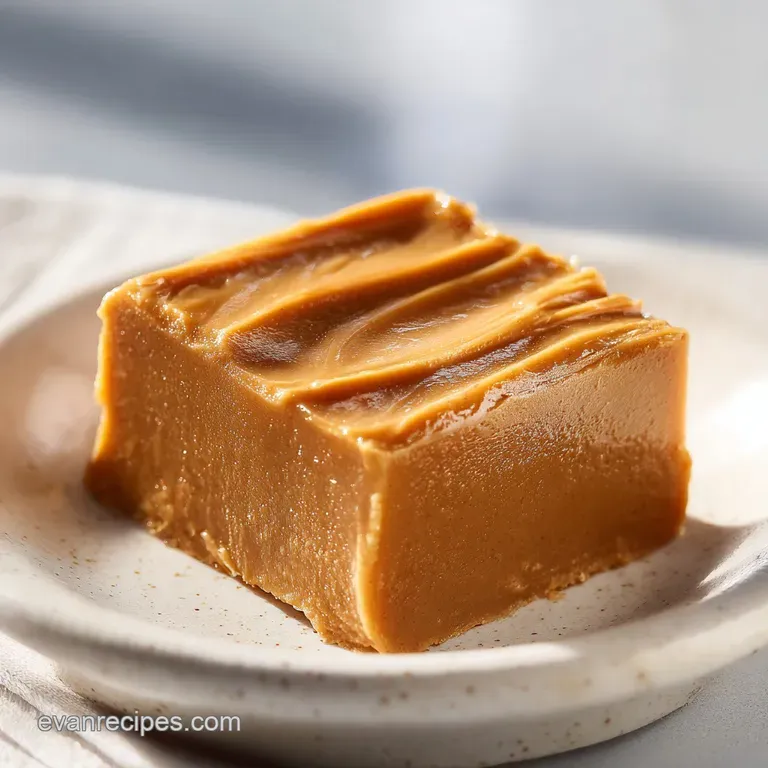
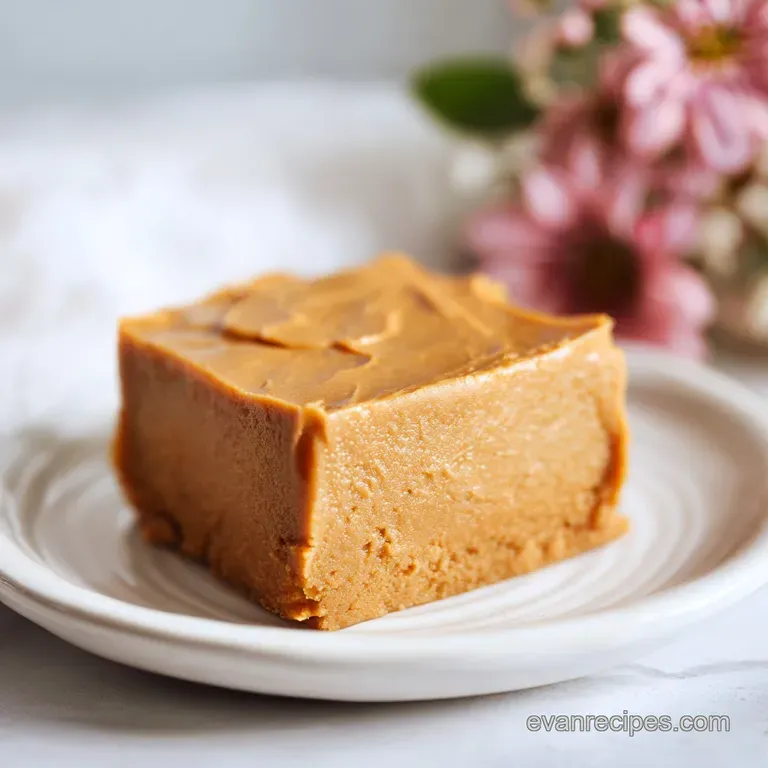
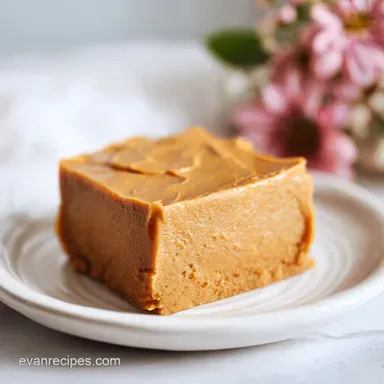
Easy Peanut Butter Fudge
- Time: Active 10 minutes, Passive 4 hours, Total 4 hours 10 mins
- Flavor/Texture Hook: Intensely nutty with a velvety, matte finish
- Perfect for: Holiday gifting, bake sales, or a reliable weekend treat
- How to Master the Ultimate Peanut Butter Fudge
- The Physics of the Velvety Set
- Component Analysis for High Performance Results
- The Essential Components for a Velvety Flavor Profile
- The Simple Tools Required for a Professional Finish
- Layering Flavors Through Controlled Heat and Gentle Folding
- Troubleshooting Common Pitfalls for the Perfect Set
- Scaling the Batch for Any Crowd
- Creative Variations to Customize Your Confectionery Texture
- Long Term Storage Solutions for Lasting Freshness
- Artful Slicing and Gifting Ideas for Your Creations
- Kitchen Myths and Misconceptions
- Recipe FAQs
- 📝 Recipe Card
How to Master the Ultimate Peanut Butter Fudge
You know that specific, heavy scent of warm peanut butter that just hangs in the air? It’s thick, nutty, and slightly toasted. I remember the first time I tried making this on a rainy Tuesday afternoon when I was craving something sweet but didn't want to spend three hours hovering over a candy thermometer.
The kitchen was quiet, the butter was sizzling softly in the pan, and as soon as that sweetened condensed milk hit the peanut butter, the aroma shifted into something deeply nostalgic. It’s a scent that promises comfort.
But let's be real I’ve messed this up before. I once tried to rush the setting process by shoving it in the freezer, only to end up with a brick that shattered when I tried to cut it. Another time, I didn't stir the powdered sugar in well enough, and I found little chalky pockets in every bite.
We’ve all been there. This recipe is the result of those "oops" moments, refined into a foolproof method that produces a fudge so silky it feels like luxury. We aren't just melting stuff together; we’re creating a stable emulsion that stays smooth even after days in the fridge.
The Physics of the Velvety Set
Emulsification Stability: The fats in the peanut butter and butter are bound by the proteins in the condensed milk, preventing the oil from separating during the cooling phase.
Crystalline Control: Adding powdered sugar provides tiny "seed" crystals that encourage a fine, smooth structure rather than the gritty texture found in cooked sugar fudges. This technique is actually quite similar to the base of my favorite Chocolate Peanut Butter recipe, where consistency is everything.
| Thickness | Finish Temp | Rest Time | Visual Cue |
|---|---|---|---|
| 2 cm | 45°C (Mixture) | 4 hours | Surface turns matte |
| 3 cm | 45°C (Mixture) | 6 hours | Sides pull away from foil |
| 4 cm | 45°C (Mixture) | 8 hours | Firm to a gentle thumb press |
Right then, let's talk about why we choose these specific ingredients. You might think any peanut butter works, but for the best structural integrity, we need that standard commercial creamy variety. It has the stabilizers built in that help us achieve that "shatter proof" bite.
Component Analysis for High Performance Results
| Ingredient | Science Role | Pro Secret |
|---|---|---|
| Creamy Peanut Butter | Primary Fat/Protein | Use stabilized brands for a smoother, non oily finish |
| Condensed Milk | Liquid Sugar/Emulsifier | Ensure it's room temp to prevent the butter from seizing |
| Unsalted Butter | Mouthfeel/Richness | Brown it slightly for a deeper, toasted profile |
| Powdered Sugar | Structural Solid | Sift twice to ensure zero lumps in the final melt |
When you’re looking for a balanced sweetness, the sea salt is actually more important than the sugar. It cuts through the heavy fat and makes the peanut flavor pop. It's the same logic I use when I'm perfecting a Chewy Chocolate Chip recipe — salt is a flavor carrier, not just a seasoning.
The Essential Components for a Velvety Flavor Profile
- 510g Creamy Peanut Butter: Why this? Provides the structural protein and fat base for the entire fudge block.
- Substitute: Almond butter (no stir variety only). Note: This will result in a softer set.
- 397g Sweetened Condensed Milk: Why this? Acts as the binder and primary sweetener without needing to boil sugar.
- Substitute: Coconut condensed milk. Note: Adds a distinct tropical note and is slightly less thick.
- 115g Unsalted Butter: Why this? Adds a rich, creamy mouthfeel and helps the fudge firm up when chilled.
- Substitute: Salted butter (reduce the added salt to 1/8 tsp).
- 5ml Pure Vanilla Extract: Why this? Rounds out the nuttiness with a floral, sweet aroma.
- Substitute: Vanilla bean paste for those beautiful little black specks.
- 1.5g Fine Sea Salt: Why this? Sharpens the peanut flavor and balances the intense sweetness of the milk.
- Substitute: Table salt (use slightly less as it’s finer).
- 60g Powdered Sugar: Why this? Stabilizes the mixture and ensures a matte, professional finish.
- Substitute: Finely blended coconut sugar (will change the color to dark brown).
Chef Tip: Freeze your butter for 10 minutes before dicing it. This keeps the fat cold longer as you prep, which helps it emulsify more slowly and evenly when it hits the warm peanut butter.
The Simple Tools Required for a Professional Finish
You don't need a lab, but a heavy bottomed saucepan is non negotiable here. Thin pans have hot spots that will scorch the condensed milk in seconds, and once that sugar burns, there is no coming back.
I also swear by a silicone spatula; it allows you to scrape the bottom of the pan clean with every stroke, ensuring no part of the mixture gets left behind to overcook.
For the mold, a 20cm square pan is the sweet spot. It gives you that thick, chunky fudge look we all love. Line it with parchment paper or foil, but leave an overhang on the sides. This "sling" is your best friend when it's time to lift the set fudge out for slicing.
Trust me, trying to dig fudge out of a pan corner with a knife is a recipe for a crumbled mess.
Layering Flavors Through Controlled Heat and Gentle Folding
- Line the pan. Use a 20cm square baking tin and cover with parchment, leaving a 5cm overhang. Note: This ensures easy removal once the fudge is firm.
- Combine fats. Place 115g butter and 397g condensed milk in a heavy saucepan over low heat.
- Melt slowly. Stir constantly until the butter is completely liquid and fully incorporated into the milk.
- Whisk the solids. Sift 60g powdered sugar and 1.5g salt into a small bowl to remove any clumps.
- Temper the peanut butter. Add 510g peanut butter to the warm milk mixture. Note: Do not boil; we only want to soften the peanut butter proteins.
- Stir until glossy. Use a spatula to fold the mixture until it becomes smooth, shiny, and pulls away from the sides.
- Off heat finish. Remove the pan from the burner and stir in 5ml vanilla extract and the sugar/salt mix.
- Final emulsification. Beat the mixture vigorously for 30 seconds until the sheen disappears and it looks matte.
- Press and level. Transfer to the tin, smoothing the top with an offset spatula.
- Chill thoroughly. Refrigerate for at least 4 hours until the block feels solid and cold.
The magic happens in step 8. That final beating of the mixture is what transforms it from a greasy sauce into a structured fudge. You'll see the texture change right before your eyes it goes from looking oily to looking like soft clay. That’s the sign that your emulsion is perfect.
Troubleshooting Common Pitfalls for the Perfect Set
Why Your Fudge Feels Gritty
Usually, this happens because the powdered sugar wasn't sifted or was added while the mixture was too hot, causing the sugar to melt and then recrystallize unevenly. If you feel a "crunch" that isn't salt, the sugar didn't integrate properly.
Rescuing an Oily Surface
If you see pools of oil on top of your fudge as it cools, the emulsion broke. This often happens if the heat was too high. You can sometimes save this by quickly stirring in a tablespoon of room temperature condensed milk before it sets, which helps re bind the fats.
| Problem | Root Cause | Solution |
|---|---|---|
| Soft/Gooey | Insufficient chilling time | Return to fridge for at least 2 more hours |
| Crumbly texture | Too much powdered sugar | Measure by weight next time to ensure accuracy |
| Burnt bottom | Heat was too high | Use a double boiler method for more control |
Common Mistakes Checklist
- ✓ Sift the powdered sugar twice to prevent chalky pockets in the center.
- ✓ Never let the mixture reach a rolling boil; high heat breaks the fat bonds.
- ✓ Use a silicone spatula to scrape the bottom constantly while heating.
- ✓ Resist the urge to slice early; the internal structure needs time to stabilize.
- ✓ Use standard creamy peanut butter; "natural" varieties often separate and ruin the set.
Scaling the Batch for Any Crowd
When scaling down for a small craving, you can easily halve this. Use a smaller rectangular container (like a glass meal prep dish) to maintain the height. If you halve the recipe, the cooling time reduces by about 20%, so you might be ready to slice in 3 hours.
Scaling up is a bit trickier. If you double the recipe, do not double the salt use only 1.5x the amount (about 2.2g) to keep the flavor balanced. Also, when working with a larger volume of peanut butter, it takes longer to heat through. Work in batches or use a very large, wide pot to ensure even heat distribution. If you enjoy making larger batches of sweets, you might find the technique similar to preparing a Peanut Butter Balls Recipe, where handling the dough in sections is key to consistency.
| Method | Time | Texture | Best For |
|---|---|---|---|
| Stovetop | 15 mins | Superior silkiness | Best overall flavor |
| Microwave | 5 mins | Slightly more dense | Quick cravings |
| Double Boiler | 20 mins | Most consistent | Beginners fearing burn |
If you're making this for a big party, consider using a mini muffin tin lined with paper liners instead of a square pan. You can drop a spoonful into each liner, and you've got instant, perfectly portioned servings without the stress of slicing straight lines.
Creative Variations to Customize Your Confectionery Texture
The Crunch Factor
If you're a fan of texture, swap half of the creamy peanut butter for a high-quality crunchy version. Alternatively, fold in 100g of roasted, salted peanuts right before pouring the mixture into the pan. This provides a "shatter" effect against the velvety base.
Chocolate Marbling
Melt 100g of dark chocolate chips and drizzle them over the top of the fudge while it’s still warm in the pan. Use a toothpick to swirl the chocolate into the peanut butter base. This creates a beautiful marbled effect that looks incredibly professional.
Long Term Storage Solutions for Lasting Freshness
Storage is simple: keep it airtight. Because of the high fat and sugar content, this fudge doesn't "spoil" quickly, but it will absorb smells from the fridge if not sealed tight. I recommend wrapping the whole block in plastic wrap, then placing it in a Tupperware container.
It stays perfect in the fridge for up to 2 weeks.
For long term storage, this fudge freezes like a dream. Slice it into squares first, then freeze them on a baking sheet. Once they are hard, toss them into a freezer bag. They’ll stay fresh for 3 months.
When you're ready to eat, let them sit on the counter for 10 minutes they actually have a wonderful "fudgsicle" texture when eaten slightly chilled.
Zero Waste Tip: If you find yourself with the "crumbs" or messy edges after slicing, don't toss them! Crumble them over vanilla ice cream or fold them into a batch of brownie batter. You can even melt the scraps down and use them as a decadent dip for apple slices.
Artful Slicing and Gifting Ideas for Your Creations
To get those perfectly sharp, clean edges you see in candy shops, you need a warm knife. Run a long chef's knife under hot water, wipe it dry, and make one long, confident cut. Wipe the blade clean and reheat it between every single slice.
It sounds tedious, but the visual result is a set of perfectly smooth cubes with zero dragging or tearing.
For gifting, I love using small parchment lined cardboard boxes. Place 4-6 squares inside and tie it with a simple piece of kitchen twine. Since this fudge is stable at room temperature for a few hours, it's a great choice for delivery.
If you want to take it a step further, sprinkle a tiny pinch of flaky Maldon salt on top of each square just before the fudge fully sets it adds a gorgeous sparkle and a sophisticated finish.
If you’re building a dessert board, pair these squares with something tart, like dried apricots or fresh raspberries. The acidity of the fruit cuts through the richness of the peanut butter, making the whole experience feel much more balanced. It’s the same logic behind why a Custard Bread Pudding recipe works so well with a berry compote; contrast is the secret to a professional dessert plate.
Kitchen Myths and Misconceptions
One common myth is that you need to boil the mixture to get it to set. In this specific recipe, boiling is actually the enemy. We aren't making a caramel; we are making an emulsion. If you boil the condensed milk, you risk curdling the dairy or causing the oils in the peanut butter to separate.
Gentle heat is all you need.
Another misconception is that natural peanut butter is "healthier" for fudge. While it's great on toast, the lack of stabilizers (like palm oil or emulsifiers) in natural peanut butter means the oil will likely separate during the cooling process, leaving you with a greasy mess instead of a firm block.
Stick to the classic creamy brands for this one save the natural stuff for your morning smoothies! Finally, don't believe the idea that you have to use a candy thermometer. While they are great for traditional recipes, this version is designed to be visual. When the mixture goes matte and thickens, it's done.
Trust your eyes over the gauge.

Recipe FAQs
Can I substitute natural, unsweetened peanut butter for creamy commercial peanut butter?
No, this affects structure significantly. Natural peanut butter lacks the necessary stabilizers, causing the oil to separate during cooling, which results in a greasy, unset fudge.
How long must the fudge chill before it can be safely sliced?
Refrigerate for a minimum of four hours. This allows the emulsion to fully stabilize and firm up, which prevents the fudge from crumbling or sticking to the knife during cutting.
How do I achieve perfectly clean, non-ragged edges when cutting the fudge?
Heat a long chef's knife under hot water. Wipe the blade completely dry and make one decisive cut, then reheat and wipe the knife before every subsequent slice to ensure a smooth, professional finish.
Is it true that boiling the mixture is necessary to achieve a firm set?
False. Boiling is counterproductive in this recipe as we are creating an emulsion, not a hard crack candy; high heat can cause the fats to separate, leading to an oily texture.
How should I store the finished peanut butter fudge to maintain freshness?
Wrap tightly and refrigerate. Store the fudge airtight in the refrigerator for up to two weeks; the fat content keeps it moist, but an airtight seal prevents it from absorbing other odors.
What is the correct technique for making the final mixture matte instead of glossy?
Vigorously beat the mixture off the heat for 30 seconds. This final agitation ensures the powdered sugar is fully incorporated and stabilizes the emulsion, transitioning the surface from shiny to matte, similar to the key finishing technique in our Moist Banana Bread recipe.
Can I use a microwave instead of the stovetop for melting the base ingredients?
Yes, but manage the power carefully. Microwave the butter and condensed milk at 50% power in short bursts, stirring often, to prevent scorching the milk solids before incorporating the peanut butter.
Easy Peanut Butter Fudge
Ingredients:
Instructions:
Nutrition Facts:
| Calories | 148 kcal |
|---|---|
| Protein | 4.4 g |
| Fat | 10.6 g |
| Carbs | 10.4 g |
| Fiber | 0.9 g |
| Sugar | 8.8 g |
| Sodium | 91 mg |
