Peanut Butter Cookies: Crisp and Soft
- Time: Active 10 minutes, Passive 10 minutes, Total 20 minutes
- Flavor/Texture Hook: A shatter crisp sugar crust with a velvety, melt in-your mouth center.
- Perfect for: Afternoon snacks, school bake sales, or satisfying a late night sweet craving.
- The Secret to Perfect Chewy Peanut Butter Cookies
- Flavor Building in Every Bite
- Deep Dive into Every Ingredient
- Components for Your Cookie Dough
- Tools to Get the Job Done
- Mixing and Baking the Dough
- Solving Common Baking Mistakes
- Making More or Fewer Cookies
- Creative Recipe Variations to Try
- Keeping Every Batch Fresh
- Styling Your Dessert Platter
- Debunking Cookie Myths
- Recipe FAQs
- 📝 Recipe Card
The Secret to Perfect Chewy Peanut Butter Cookies
Forget the idea that you need a dozen ingredients or hours of chilling time to make a bakery level treat. Most people think the secret to a great cookie is some exotic type of flour or a fancy French butter, but that is a total myth.
The reality is much simpler, and honestly, a lot more fun to master once you understand how the pantry staples you already have interact with one another. I used to think chilling the dough for twenty four hours was a non negotiable rule, but for this specific recipe, that actually works against you.
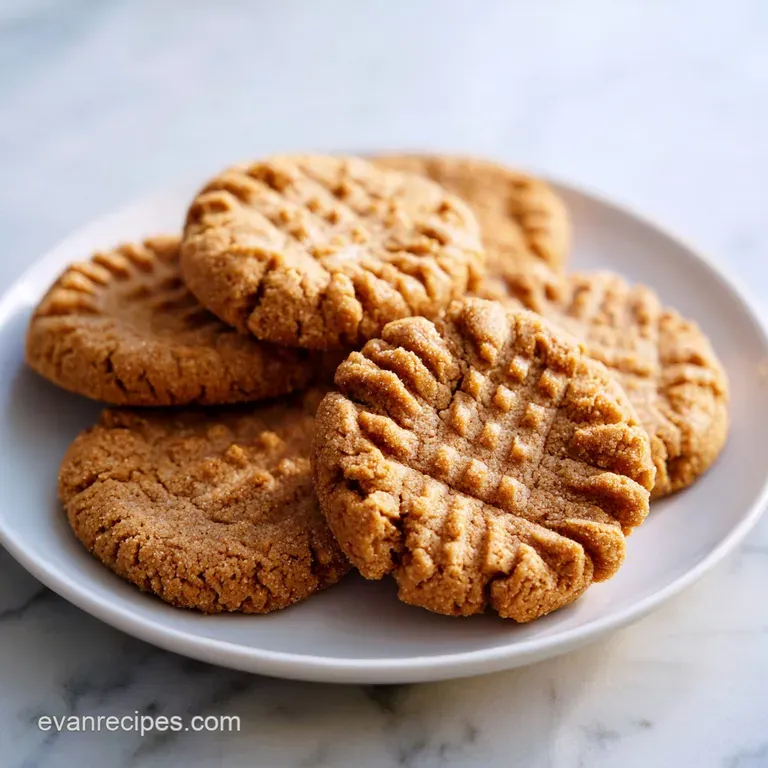
When you pull these out of the oven, the first thing you notice is the aroma it is that deep, roasted scent of toasted peanuts and warm vanilla that fills every corner of the kitchen.
You will see the signature crosshatch marks have slightly widened, creating little valleys where the granulated sugar has crystallized into a glittering, crunchy coating. It is the kind of cookie that feels substantial when you pick it up but practically dissolves the moment it hits your tongue.
We are looking for that specific contrast between the golden brown bottom and the pale, tender middle. If you have ever struggled with cookies that turn into hard disks or ones that spread so much they touch the edges of the pan, you are in the right place.
We are going to break down why this specific ratio of dark brown sugar to granulated sugar creates that chewy "bend" we all crave. Let's get the oven preheated and dive into what makes this batch better than the rest.
Flavor Building in Every Bite
To understand why this recipe works, we have to look at the interaction between the fats and the sugars. We aren't just mixing things together; we are building a structural lattice that holds air and moisture in place.
- Mechanical Aeration: Beating the butter and sugars for three minutes creates tiny air pockets that expand in the heat, giving the cookie lift without relying solely on chemical leaveners.
- Moisture Retention: Dark brown sugar contains more molasses than light brown sugar, which attracts water and keeps the center of the cookie soft for days.
- Oil Stabilization: Adding the peanut butter last ensures the natural oils don't break down the air bubbles we worked so hard to create during the creaming stage.
- Heat Impact: Baking at 190°C (375°F) sets the edges quickly, which stops the spread while leaving the center underbaked enough to stay fudgy.
Precision Cooking Benchmarks
| Thickness | Internal Temp | Rest Time | Visual Cue |
|---|---|---|---|
| 1/2 inch | 175°F (80°C) | 5 minutes | Edges golden, center looks matte |
| 3/4 inch | 180°F (82°C) | 8 minutes | Crosshatch marks are defined |
| 1 inch | 185°F (85°C) | 10 minutes | Bottom is deeply caramelized |
Selecting the right method for your kitchen setup can change the final texture of your bake. While the oven is the classic choice, you might find that different environments require slight tweaks to how you handle the dough.
| Method | Time | Texture | Best For |
|---|---|---|---|
| Standard Oven | 10 minutes | Crisp rim, soft heart | The classic experience |
| Convection Oven | 8 minutes | Evenly crunchy throughout | Thinner, snappier cookies |
| Toaster Oven | 12 minutes | Soft and deeply browned | Small batches or single servings |
The standard oven method remains my favorite because it allows for the most consistent heat distribution around the individual dough balls. This creates that specific "target" look where the outside is darker than the inside.
If you use a convection oven, the fan moves the air so efficiently that the cookie dries out faster, which is great if you love a crunchy biscuit, but less ideal if you want that chewy pull.
Deep Dive into Every Ingredient
Every component in this recipe serves a dual purpose, acting as both a flavor agent and a structural engineer. When we talk about the ingredients, we are looking at how they behave under the intense heat of the oven.
| Ingredient | Science Role | Pro Secret |
|---|---|---|
| Dark Brown Sugar | Humectant | Use "packed" sugar to ensure the molasses content is high enough for chewiness. |
| Creamy Peanut Butter | Fat/Protein source | Avoid "natural" stir style brands here; the stabilized oils prevent the cookie from collapsing. |
| Baking Soda | Browning agent | It reacts with the acidic molasses in the brown sugar to create carbon dioxide and better browning. |
| Large Egg | Emulsifier | Ensure it is at room temperature so it bonds instantly with the creamed butter. |
When these ingredients combine, they undergo a transformation. The flour provides the protein (gluten) needed to hold the shape, while the fats from the butter and peanut butter coat those proteins to keep them from getting too tough. It is a delicate tug of-war between crispy and soft.
Components for Your Cookie Dough
I have spent a lot of time testing different brands, and while you don't need to buy the most expensive items, the quality of your peanut butter and vanilla will be very obvious in the final result.
- Creamy Peanut Butter (1 cup / 250g): Why this? Provides the core flavor and essential fats for a velvety mouthfeel.
- Unsalted Butter (0.5 cup / 115g): Why this? Allows you to control the salt levels perfectly while adding a rich, milky undertone.
- Dark Brown Sugar (0.75 cup / 150g): Why this? The high molasses content is the key to that deep caramel flavor and chewy texture.
- Granulated Sugar (0.5 cup / 100g): Why this? This sugar helps the edges crisp up and provides the necessary structure for aeration.
- Large Egg (1 unit): Why this? Acts as the "glue" that binds the fats and dry ingredients together into a cohesive dough.
- Vanilla Extract (1 tsp): Why this? Rounds out the saltiness of the peanut butter with a sweet, floral aromatic note.
- All Purpose Flour (1.5 cups / 190g): Why this? The middle ground protein content ensures the cookie isn't too crumbly or too bread like.
- Baking Soda (0.75 tsp): Why this? Provides the necessary lift and encourages the Maillard reaction for a golden crust.
- Fine Sea Salt (0.5 tsp): Why this? Cuts through the richness and makes the peanut flavor truly pop on the palate.
- Granulated Sugar for Rolling (3 tbsp): Why this? Creates a textural contrast and a beautiful glittering finish on the exterior.
| Original Ingredient | Substitute | Why It Works |
|---|---|---|
| Dark Brown Sugar | Light Brown Sugar | Similar moisture, but the flavor will be more like mild honey than deep caramel. |
| Creamy Peanut Butter | Almond Butter (No stir) | Similar fat ratio. Note: Result will be less "punchy" and more nutty/earthy. |
| All Purpose Flour | 1 to-1 GF Flour | Starch blends mimic gluten. Note: Cookies may spread slightly more; chill dough for 10 mins. |
If you find yourself out of dark brown sugar, you can actually make your own by mixing a tablespoon of molasses into a cup of white sugar. It is a lifesaver when you are mid bake and realize the pantry is bare. For a different twist on this classic, you might want to try making a Peanut Butter Fudge Recipe which uses similar flavor profiles but in a much denser, no bake format.
Tools to Get the Job Done
You don't need a professional kitchen, but having the right weights and measures makes a massive difference in baking. Precision is the friend of the home cook.
- Stand Mixer or Hand Mixer: Essential for the three minute creaming process. You simply cannot get enough air into the butter by hand without your arm falling off.
- Digital Kitchen Scale: Baking by weight (grams) is the only way to ensure your cookies come out the same every single time.
- Large Baking Sheets: Use heavy duty rimmed sheets. Thin pans can warp in a 190°C oven and cause uneven browning.
- Parchment Paper: This prevents sticking and ensures the bottoms of the cookies don't get too dark too quickly. Silpats work well too, but parchment gives a slightly crispier edge.
- Wire Cooling Rack: Crucial for stopping the cooking process. If they stay on the hot pan, the bottoms will turn from golden to burnt in minutes.
Chef's Tip: Freeze your baking sheets for 5 minutes before lining them with parchment. This small temperature drop prevents the butter in the dough from melting the second it touches the pan, giving you more control over the spread.
Mixing and Baking the Dough

The process of making these cookies is rhythmic and satisfying. Pay close attention to the visual cues at each stage, as they are more important than the timer.
- Cream the fats. Combine the softened butter, dark brown sugar, and granulated sugar in your mixer bowl and beat on medium high for 3 minutes until the mixture is pale and light. Note: This creates the air pockets needed for lift.
- Emulsify the liquids. Add the room temperature egg and vanilla extract, beating for exactly 1 minute until thick ribbons form when the beater is lifted.
- Introduce the peanut butter. Fold in the 1 cup of creamy peanut butter using a spatula or low mixer speed until just combined. Note: Overmixing here can cause the oils to separate.
- Prepare the dry base. Whisk the flour, baking soda, and sea salt in a small separate bowl until no lumps remain.
- Combine the mixtures. Gradually pour the dry ingredients into the wet mixture, mixing on the lowest speed until the last streak of white flour disappears.
- Portion the dough. Scoop rounded tablespoons (about 30g) and roll them between your palms until you have smooth, crack free spheres.
- Apply the coating. Roll each sphere in the extra granulated sugar until fully sparkling and coated.
- Create the pattern. Place balls 2 inches apart on the pan and press a fork twice in a crosshatch pattern until flattened to about half an inch thick.
- Bake with precision. Slide into the 190°C (375°F) oven for 10 minutes until the edges are firm but the center is still soft.
- Cool properly. Let the cookies sit on the hot sheet for 5 minutes before moving them to a wire rack to allow the structure to set.
Batch Comparison: Fast vs. Classic
| Feature | Fast Method (This Recipe) | Classic Method (Chilled) |
|---|---|---|
| Dough State | Room Temp | Chilled 24 hours |
| Texture | Soft and tender | Dense and chewy |
| Prep Time | 20 minutes total | 24+ hours |
The beauty of this over high heat, no chill method is the immediate gratification. You get a cookie that is lighter and more aerated, which I find pairs much better with a cold glass of milk or a hot coffee.
Solving Common Baking Mistakes
Even the best bakers run into trouble. Peanut butter is a fickle ingredient because of its high fat and protein content, which can change depending on the brand or even the temperature of your kitchen.
Balancing the Sugar Content
If your cookies are coming out too sweet, it is usually because the peanut butter used already had a high sugar content. Most commercial brands (like Jif or Skippy) are sweetened. If you use a brand with zero sugar, you might actually need to increase the sugar in the recipe slightly to keep the texture soft.
It is all about the balance between the sugar and the salt.
Optimizing the Fat Mixture
When the butter is too cold, it won't cream properly with the sugar. You will end up with little pebbles of butter throughout the dough. These melt in the oven and create greasy holes. On the flip side, if the butter is melted, the air pockets won't form at all, and your cookies will be flat and oily.
"Softened" means you can leave an indent with your finger, but the butter still holds its shape.
Mastering the Oven Heat
If your oven isn't truly at 190°C (190°C), the timing will be off. I highly recommend using an oven thermometer. At lower temperatures, the cookies will spread for too long before they set, leading to thin, crispy wafers rather than thick, chewy cookies.
High heat is the secret to that "soft set" center we love.
| Problem | Root Cause | Solution |
|---|---|---|
| Excessive Spreading | Butter was too warm or greasy | Chill the dough balls for 10 mins before baking to firm up the fats. |
| Crumbly Texture | Too much flour or overbaked | Use a scale for flour and pull cookies out when they still look "wet" in the center. |
| Hard Bottoms | Dark baking sheet | Move the rack to the upper third of the oven or use a double layered pan. |
Common Mistakes Checklist:
- ✓ Always use room temperature eggs to avoid "curdling" the creamed butter.
- ✓ Measure your flour by spooning it into the cup and leveling it off (if not using a scale).
- ✓ Never place raw dough onto a hot baking sheet from a previous batch.
- ✓ Use a "no stir" creamy peanut butter for the most consistent structural results.
- ✓ Don't skip the salt; it is the only thing that makes the peanut flavor stand out.
Making More or Fewer Cookies
If you are cooking for a crowd or just for yourself, adjusting the batch size is straightforward as long as you keep the ratios intact.
- Cutting the batch in half: This is easy! Use half of every measurement. For the egg, whisk one large egg in a small bowl and measure out exactly 2 tablespoons (roughly 25-30g) to use in the dough. This keeps the moisture levels perfect.
- Doubling the recipe: When making 48 cookies, I recommend mixing the dry ingredients in two separate batches to ensure the baking soda is evenly distributed. Don't double the salt or spices fully use about 1.5x the amount of salt and vanilla to avoid overpowering the palate.
- Baking large batches: Work in rounds. Only have one tray in the oven at a time on the center rack. If you try to bake two trays at once, the airflow is restricted, and the cookies won't get that specific over high heat "set."
If you find yourself with extra dough that you don't want to bake right away, you can actually use the same flavor profile for other treats. For example, Peanut Butter Balls Recipe are a fantastic way to use up that extra peanut butter in a no bake format that keeps well in the fridge.
Creative Recipe Variations to Try
Once you have mastered the base dough, you can start layering in different textures and flavors to make the recipe your own.
- The Crunch Factor: Swap half of the creamy peanut butter for extra crunchy peanut butter. This adds a "shatter" effect to the chewiness that is incredibly satisfying.
- Chocolate Chip Integration: Fold in half a cup of dark chocolate chips (60% cacao or higher). The bitterness of the chocolate cuts through the salty sweet dough perfectly.
- The Salty Dog: After the crosshatch press, sprinkle a tiny pinch of Maldon flaky sea salt over the top of each cookie. It creates a professional, gourmet finish.
- The Spicy Kick: Add a quarter teaspoon of cayenne pepper to the dry ingredients. It sounds wild, but the heat of the pepper complements the roasted peanuts in a way that feels very sophisticated.
Decision Shortcut
- If you want Extra Crispy Cookies: Bake for 12 minutes and replace the brown sugar entirely with granulated sugar.
- If you want Bakery Style Softness: Replace the dark brown sugar with light brown sugar and add 1 extra tablespoon of cornstarch to the flour.
- If you want Maximum Flavor: Use a high-quality vanilla bean paste instead of extract and brown your butter before creaming (let it solidify again first).
Keeping Every Batch Fresh
These cookies have a surprisingly long shelf life because the sugar and fat act as natural preservatives. However, how you store them will determine if they stay "velvety" or turn "stony."
- Countertop
- Store in an airtight glass jar for up to 5 days. I like to put a small piece of white bread in the jar; the cookies will absorb the moisture from the bread and stay soft much longer.
- Freezing Dough
- You can freeze the rolled, sugared balls (before the fork press) for up to 3 months. When you are ready to bake, just press them with a fork while frozen and add 2 minutes to the baking time.
- Freezing Baked Cookies
- Wrap individual cookies in plastic wrap and store in a freezer bag for 2 months. Thaw at room temperature for 15 minutes before eating.
Zero Waste Tip: If you have cookies that have gone stale, don't throw them away! Pulse them in a food processor to create a "cookie sand." This makes an incredible crust for a cheesecake or a topping for vanilla bean ice cream. You can also crumble them into a Peanut Butter Cake batter for added texture and a burst of roasted nut flavor.
Styling Your Dessert Platter
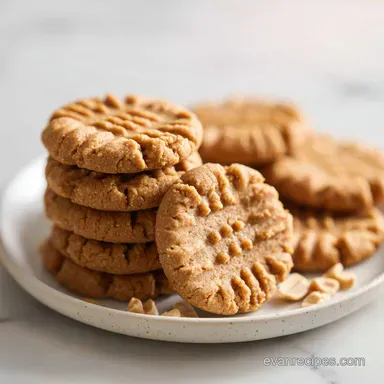
When you are serving these, presentation is what makes them go from "homemade" to "mastered." I love to serve these on a dark wooden board to make the golden brown colors and the white sugar crystals pop.
Arrange the cookies in a slightly overlapping circular pattern. This encourages people to grab more than one. If you are serving them at a party, pair them with something that contrasts the richness. A bowl of tart raspberries or a few slices of crisp green apple can cleanse the palate between bites.
Another trick I use is to serve them alongside a small dish of warm chocolate ganache for dipping. It turns a simple cookie into an interactive dessert experience. The contrast between the warm, liquid chocolate and the firm, sugary crust of the cookie is something your guests won't forget anytime soon.
Debunking Cookie Myths
There are so many "rules" in baking that aren't actually true. Let's clear up a few for this specific recipe.
- Myth: You must chill the dough to prevent spreading. In this recipe, we use high heat (190°C) and a specific ratio of sugars to control the spread. Chilling actually makes these cookies too dense and prevents the edges from getting that signature "shatter" texture.
- Myth: Natural peanut butter is better for baking. While it is great for toast, natural peanut butter (the kind that separates) is too unstable for this dough. The fluctuating oil content will cause your cookies to be greasy and inconsistent.
- Myth: Fork marks are just for decoration. While they look great, the crosshatch pattern actually serves a functional purpose. Peanut butter dough is very dense; by flattening it with a fork, we ensure the heat can penetrate the center evenly, so the cookie bakes through before the edges burn.
This recipe is all about trust. Trust the high heat, trust the three minute creaming time, and trust that pulling them out while they still look a little "underdone" is the key to perfection. Once you see that first batch come out glowing and smelling like heaven, you will never go back to store-bought again.
Happy baking!

Recipe FAQs
What is the recipe for Snoop Dogg's peanut butter cookies?
This recipe is not based on that version. Our formula uses a specific ratio of creamy peanut butter, dark brown sugar, and granulated sugar to achieve a signature crisp edge and soft center in just 20 minutes.
What are the three main ingredients in these peanut butter cookies?
Creamy peanut butter, butter, and brown sugar are the primary components. These create the necessary fat structure, moisture, and deep flavor profile that defines the texture of these cookies.
Are these peanut butter cookies good for diabetics?
No, these cookies contain significant amounts of granulated and dark brown sugar. They are intended as a traditional treat and are not formulated for specialized diabetic dietary requirements.
How to achieve the perfect texture with these cookies?
Beat the softened butter and sugars on medium high speed for exactly three minutes. This aeration process builds the structural foundation needed for a soft, velvety center, similar to how we manage volume in our bright, zesty sugar cookies.
Is it true I must chill the dough for 24 hours to prevent spreading?
No, this is a common misconception. Chilling the dough for this specific recipe actually works against the intended texture; following the immediate assembly instructions ensures the best balance of crisp edges and soft centers.
How to ensure the cookies do not turn into hard disks?
Bake at 375°F for exactly 10 minutes and remove them while the center still looks slightly soft. Carry over heat will finish the cooking process on the pan, keeping the interior tender rather than drying it out.
How to get the signature crosshatch pattern?
Use a dinner fork to press gently into the dough spheres once they are placed on the parchment lined baking sheet. Cross the marks to create the pattern, which also helps flatten the dough slightly to ensure even baking.
Classic Peanut Butter Cookies
Ingredients:
Instructions:
Nutrition Facts:
| Calories | 174 kcal |
|---|---|
| Protein | 3.7 g |
| Fat | 9.4 g |
| Carbs | 19.9 g |
| Fiber | 0.9 g |
| Sugar | 11.9 g |
| Sodium | 92 mg |
