Moms Fudge Recipe: Creamy and Classic
- Time: Active 15 minutes, Passive 2 hours, Total 2 hours 25 minutes
- Flavor/Texture Hook: Deeply chocolatey, buttery rich, and perfectly smooth
- Perfect for: Holiday gift tins, nostalgic cravings, or beginner candy makers
- Nostalgic Velvet Texture of Moms Fudge Recipe
- Why This Recipe Works
- Essential Specs for Success
- The Core Ingredients Deep Dive
- Tools for a Flawless Set
- Step by Step Method Guide
- Master Class Tips and Fixes
- Flavor Tweaks and Ingredient Swaps
- Storing Your Homemade Batch
- Perfect Pairings and Presentation
- Recipe FAQs
- 📝 Recipe Card
Nostalgic Velvet Texture of Moms Fudge Recipe
Long before we had artisanal chocolate shops on every corner, there was the rhythmic scrape of a wooden spoon against a heavy bottomed pot. In the mid-20th century, specifically the post WWII era, American kitchens underwent a confectionery revolution.
This was the age of "Fantasy Fudge," a recipe that famously appeared on the back of marshmallow creme jars and became an instant cultural heirloom. It represented a shift from the finicky, temperamental fudge of the Victorian era to something reliable, decadent, and intensely chocolatey.
For many of us, the scent of boiling butter and evaporated milk is the olfactory equivalent of a warm hug from the past.
Whenever I smell that specific mixture of sugar and cocoa hitting the air, I am transported back to my mother’s yellow tiled kitchen. She didn't use a candy thermometer; she used her internal clock and the visual of a "rolling boil." There is something deeply grounding about a recipe that has survived decades of food trends.
This isn't just candy; it’s a shared memory passed down through stained index cards and whispered advice over a bubbling stove. We’ve all seen modern versions, but they often lack that specific, dense yet-tender bite that only the original method provides.
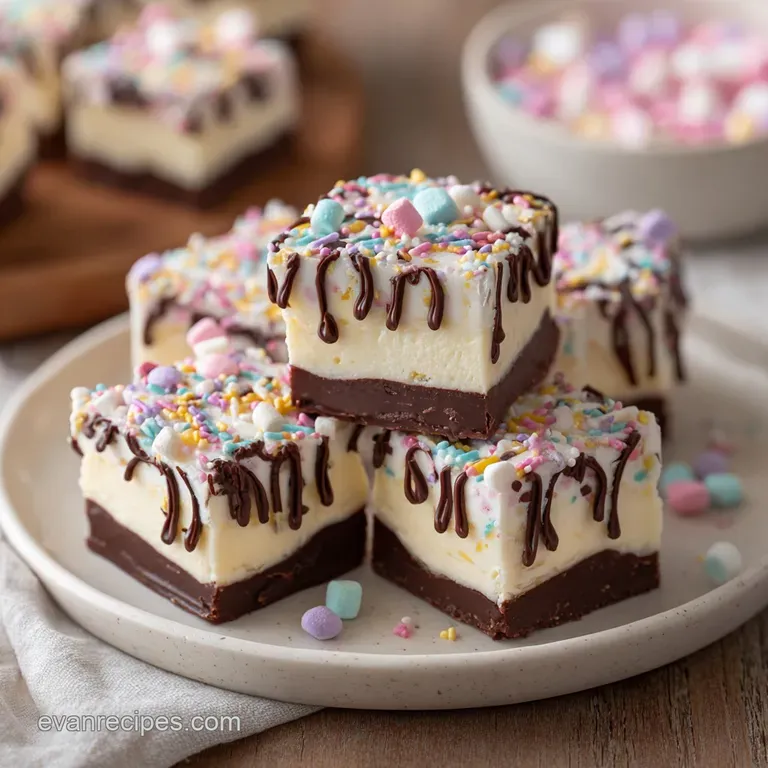
The beauty of this tradition lies in the contrast. You have the aggressive heat of the boiling sugar meeting the cool, airy pillow of marshmallow fluff. It’s a study in textures: the high gloss shine of the melted semi sweet chips against the earthy, shattered crunch of toasted walnuts.
This recipe isn't about complexity; it’s about the mastery of a few simple elements coming together at the exact right moment. If you've ever struggled with fudge that turned out like a brick or, worse, like a puddle of syrup, you’re in the right place.
We are going to honor the old school way while ensuring every batch is a success.
Why This Recipe Works
There is a specific reason why this particular method has stood the test of time while other candy recipes have faded into obscurity. It isn't just luck; it is a clever bit of kitchen logic that prevents the most common failure in candy making: unwanted crystallization.
When you boil sugar and water (or milk), the sugar wants to return to its crystalline state, which creates a gritty, "sandy" texture in your mouth.
Interfering Agent: The marshmallow fluff acts as a powerful barrier that keeps sugar crystals from bonding together, ensuring a velvety finish.
Fat Saturation: Using a full 3/4 cup of unsalted butter provides enough fat to coat the sugar molecules, adding a rich mouthfeel and a glossy sheen.
Concentrated Moisture: Evaporated milk has 60% of its water removed, providing a stable, creamy base that won't separate during the intense five minute boil.
Residual Heat Cooking: Adding the chocolate and fluff after removing the pan from the heat prevents the chocolate from scorching or seizing.
| Cook Method | Time | Texture | Best For |
|---|---|---|---|
| Stovetop | 15 minutes | Dense and velvety | Traditionalists and purists |
| Microwave | 8 minutes | Softer and lighter | Quick cravings or kids |
| Slow Cooker | 2 hours | Ultra creamy | Large holiday batches |
The stovetop method remains the gold standard because it allows for the most control over the evaporation process. When you use the microwave, you often lose that deep, caramelized undertone that comes from the direct heat of the burner against the butter and sugar.
By sticking to the classic pot and spoon approach, you ensure the structure of the fudge is strong enough to hold its shape while remaining soft enough to yield to a gentle bite.
Essential Specs for Success
When we talk about candy making, precision is our best friend. Unlike a loose stew or a casual salad, fudge is an exercise in timing. If you boil it for four minutes, it might not set and you'll end up eating it with a spoon (not that I haven't done that).
If you go to six or seven minutes, it might become crumbly and dry. We are aiming for that perfect middle ground where the sugars have reached the "soft ball" stage without crossing over into the "hard ball" territory.
| Ingredient | Science Role | Pro Secret |
|---|---|---|
| Evaporated Milk | Protein stability | Never use sweetened condensed milk; it's too thick. |
| Marshmallow Fluff | Crystal inhibition | Fold it in quickly to preserve the airy volume. |
| Semi sweet Chips | Structural base | Use high-quality chips with at least 40% cocoa. |
To get the most out of your components, it's vital to understand that evaporated milk is the backbone here. It provides the protein needed for the emulsion to hold. This is quite different from the texture you'd find in a Peanut Butter Balls recipe, where the structure relies more on solid fats and dry sugars. In this fudge, we are creating a suspension of fats and sugars that stays flexible even when cold.
The Core Ingredients Deep Dive
The Sugar Foundation
We are using 3 cups (600g) of granulated white sugar. This might seem like a lot, but it is the primary structure of the candy. Sugar does more than provide sweetness; it provides the bulk.
When combined with the 3/4 cup (170g) of unsalted butter and 2/3 cup (160ml) of evaporated milk, it forms a syrup that undergoes a significant transformation as it boils. The butter must be real butter don't even think about using margarine here.
Margarine has a higher water content and lower melting point, which can cause the fudge to "weep" oil as it cools.
The Setting Agents
The 12 oz (340g) of semi sweet chocolate chips and 7 oz (198g) of marshmallow fluff are what I call the "finishers." The chips provide the cocoa butter and solids that help the fudge firm up. I prefer semi sweet because it balances the high sugar content of the base.
If you use milk chocolate, the result can be cloying. The marshmallow fluff is the secret weapon. It introduces air and glucose syrup, which are the two things that stop the sugar from turning into a rock. It’s the difference between a chocolate bar and a piece of true fudge.
The Finishers
Finally, we have the flavor enhancers: 1 tsp (5ml) of pure vanilla extract, 1/4 tsp of fine sea salt, and 1 cup (120g) of chopped walnuts or pecans. The salt is non negotiable. It cuts through the richness and makes the chocolate flavor pop.
The vanilla should always be added at the very end, off the heat, because the aromatic compounds in vanilla are volatile and will evaporate if boiled. As for the nuts, toasting them for 5 minutes in a dry pan before adding them will give you a much more sophisticated, nutty aroma.
Tools for a Flawless Set
You don't need a lab full of equipment, but you do need a heavy bottomed 3 quart saucepan. A thin pot will develop hot spots, which leads to scorched milk and burnt sugar two things that will ruin a batch faster than you can say "moms fudge recipe." A heavy pot, like a high-quality stainless steel or enameled cast iron, distributes the heat evenly, allowing the rolling boil to be consistent across the entire surface of the liquid.
You will also need a sturdy silicone spatula or a wooden spoon. I prefer silicone because it’s easier to scrape the very bottom of the pot to ensure no sugar is sticking. For the pan, a 9x9 inch square baking pan is the standard. If you use an 8x8, your fudge will be thicker and require a bit more time to set.
Avoid using glass if possible, as it retains heat for a long time and can slow down the cooling process, though it will work in a pinch if that's all you have.
Finally, the most important "tool" is the parchment paper. Don't just grease the pan. Create a "sling" by cutting a piece of parchment that covers the bottom and two sides, leaving an inch of overhang.
This allows you to lift the entire block of fudge out of the pan once it’s set, making it infinitely easier to get those clean, sharp squares we all want.
step-by-step Method Guide
- Line a 9x9 inch square baking pan with parchment paper, leaving an inch of overhang on the sides to create a sling. Note: This prevents the fudge from sticking and makes removal effortless.
- In a heavy bottomed 3 quart saucepan, combine 3 cups granulated sugar, 3/4 cup unsalted butter, and 2/3 cup evaporated milk over medium heat.
- Stir constantly until the butter melts and the sugar dissolves, until the mixture is smooth and pale yellow.
- Bring the mixture to a full rolling boil this is a boil that continues to bubble vigorously even when you stir it.
- Set a timer and boil for exactly 5 minutes, stirring frequently to ensure the bottom does not scorch. Watch for the bubbles to become thick and lava like.
- Remove the pan from heat immediately to stop the cooking process.
- Aggressively stir in 12 oz semi sweet chocolate chips and 7 oz marshmallow fluff. Stir until the mixture is uniform and the chocolate is completely melted.
- Fold in 1 tsp pure vanilla extract, 1/4 tsp fine sea salt, and 1 cup chopped walnuts.
- Pour the mixture into the prepared pan, smoothing the top with your spatula until it is glossy and even.
- Let it cool at room temperature for at least 2 hours before lifting the parchment sling and slicing into 48 squares.
Master Class Tips and Fixes
One thing I've learned from years of making this is that the environment matters. If it's a very humid day, the sugar can actually pull moisture from the air, which might result in a slightly softer set. If that happens, don't panic! You can simply store the fudge in the fridge to help it keep its structure. The goal is a bite that is similar to a Fudgy Brownie recipe — substantial but yielding.
To Prevent Grainy Textures
Graininess happens when sugar crystals "seed" the rest of the mixture. To prevent this, you can take a wet pastry brush and wipe down the sides of the pot once the mixture starts to boil. This washes away any stray sugar granules that haven't dissolved yet.
Also, once you remove the pot from the heat, don't scrape the very bottom too hard if you suspect something might have slightly caught; it's better to leave a tiny bit of residue in the pot than to stir burnt bits into your velvety fudge.
To Get Clean Professional Slices
The secret to those perfect, magazine worthy squares is all in the temperature of the knife. Once the fudge is fully set, lift it out of the pan using your parchment sling. Take a long, sharp chef’s knife and run it under hot water for thirty seconds. Wipe it completely dry, then make one long, smooth cut.
Repeat the hot water and drying process for every single slice. The heat from the blade will melt the chocolate fats just enough to glide through without sticking or tearing the fudge.
| Problem | Root Cause | Solution |
|---|---|---|
| Fudge is gritty | Sugar didn't dissolve | Stir more thoroughly before the boil begins. |
| Fudge is runny | Didn't boil long enough | Ensure a "rolling" boil for the full 5 minutes. |
| Chocolate seized | Liquid hit the chocolate | Ensure the pot is off the heat before adding chips. |
Chef's Tip: If your fudge refuses to set after two hours, don't toss it! You can gently reheat it with two tablespoons of heavy cream, bring it back to a boil for one minute, and try resetting it. Or, simply call it "fudge sauce" and serve it over vanilla ice cream.
Common Mistakes Checklist
- ✓ Never substitute evaporated milk with regular milk; the water content is too high.
- ✓ Use a timer for the 5 minute boil don't guess.
- ✓ Stir the chocolate and fluff aggressively; you want to build that emulsion.
- ✓ Resist the urge to refrigerate immediately; room temperature cooling creates a better crumb.
- ✓ Toast your nuts beforehand to ensure they don't taste "raw" inside the sweet fudge.
Flavor Tweaks and Ingredient Swaps
While the original is a classic for a reason, it's fun to play with the profile. If you want a deeper, more sophisticated flavor, you can swap the semi sweet chips for dark chocolate chips (60% cocoa or higher). This will result in a less sweet, more intense chocolate experience.
You can also experiment with the types of nuts pistachios and dried cranberries make for a beautiful, festive holiday version that looks stunning in a gift box.
| Original Ingredient | Substitute | Why It Works |
|---|---|---|
| Walnuts | Salted Pretzels | Adds a massive salty sweet contrast. Note: Stays crunchy for 3 days. |
| Semi sweet Chips | Peanut Butter Chips | Creates a creamy peanut butter fudge. Note: Will be much sweeter than chocolate. |
| Vanilla Extract | Bourbon | Adds a smoky, complex oak note. Note: Use 2 tsp for a noticeable kick. |
Storing Your Homemade Batch
Fudge is remarkably shelf stable due to its high sugar content, but that doesn't mean it's invincible. To keep it at peak freshness, store it in an airtight container with pieces of parchment paper between the layers. This prevents the squares from sticking together and keeps the air from drying out the edges.
It will stay perfectly velvety at room temperature for about 1 to 2 weeks.
If you want to keep it longer, the fridge is your friend. It will last up to 3 weeks in the refrigerator, though the texture will be significantly firmer. For long term storage, you can actually freeze fudge!
Wrap the entire block (or individual squares) tightly in plastic wrap, then place it in a heavy duty freezer bag. It will stay delicious for up to 3 months. When you're ready to eat it, let it thaw in the fridge overnight and then bring it to room temperature before serving to restore that melt in-your mouth quality.
To avoid waste, save any "scraps" or crumbs from the slicing process. These are excellent when folded into a batch of brownie batter or sprinkled over a sundae. You can even melt down leftover fudge scraps with a little bit of milk to create a quick, decadent hot chocolate base.
Perfect Pairings and Presentation
When it comes to serving, this fudge is a powerhouse of richness, so it benefits from a bit of contrast. Serve it alongside a very tart fruit, like fresh raspberries or sliced green apples, to cut through the sugar. It also pairs beautifully with a dark, bitter roast of coffee or a glass of cold milk.
For a more adult presentation, try a small square of fudge with a glass of tawny port or a smoky Scotch the chocolate notes in the fudge will bring out the hidden complexities in the spirits.
If you’re giving this as a gift, presentation is everything. Instead of just a plastic bag, find a small tin or a sturdy cardboard box. Line the box with colorful tissue paper and place the fudge in individual cupcake liners.
This prevents the pieces from bumping into each other and makes it look like it came from a high end confectionery. A little bit of twine and a handwritten tag mentioning "Mom's Secret Recipe" adds that final touch of warmth that makes homemade gifts so special.
Ultimately, this fudge works because it doesn't try too hard. It’s a straightforward, honest piece of candy that relies on the harmony of butter, sugar, and chocolate. When you take that first bite and feel the smooth texture give way to the crunch of the walnuts, you'll understand why this recipe hasn't changed in over fifty years.
It’s a masterclass in simplicity, and once you’ve nailed the five minute boil, you’ll be the one passing down the recipe to the next generation. Keep the heat steady, keep the spoon moving, and enjoy the process of making something truly timeless.

Recipe FAQs
What is the secret to perfect fudge?
The secret is achieving a true full rolling boil for exactly five minutes. This process ensures the sugar crystallizes correctly for a velvety texture; if you enjoyed mastering this specific boiling technique, see how we apply similar precision in our Peanut Butter Chocolate Balls recipe.
Can you use marshmallows instead of marshmallow cream?
No, stick with marshmallow fluff. Marshmallow cream has the specific consistency needed to stabilize the fudge, whereas melted whole marshmallows will result in a grainy, uneven texture.
What are the common mistakes when making fudge?
Failing to stir constantly is the biggest mistake. You must stir frequently during the five minute boil and aggressively during the mixing phase to prevent scorching and ensure the chocolate melts uniformly.
How long does fudge last unrefrigerated?
It stays fresh for one to two weeks. Store it in an airtight container with parchment paper between layers to keep the edges from drying out.
How to ensure the fudge is easy to remove from the pan?
Line your 9x9 inch pan with parchment paper, leaving an inch of overhang on the sides. This creates a sling that allows you to lift the entire block of fudge out of the pan once it has set for two hours.
Is it true that I should boil the mixture on high heat to save time?
No, this is a common misconception. Using medium heat is necessary to melt the butter and dissolve the sugar properly before the boil; rushing the process on high heat often leads to burned dairy or grainy sugar crystals.
How to fix grainy fudge?
Unfortunately, once fudge is grainy, it cannot be fixed. Graininess usually occurs if the sugar didn't dissolve completely before the boil or if the mixture wasn't stirred enough while adding the chocolate chips and marshmallow fluff.
Classic Moms Fudge Recipe

Ingredients:
Instructions:
Nutrition Facts:
| Calories | 142 kcal |
|---|---|
| Protein | 1 g |
| Fat | 6.7 g |
| Carbs | 21 g |
| Fiber | 0.6 g |
| Sugar | 18.7 g |
| Sodium | 16 mg |
