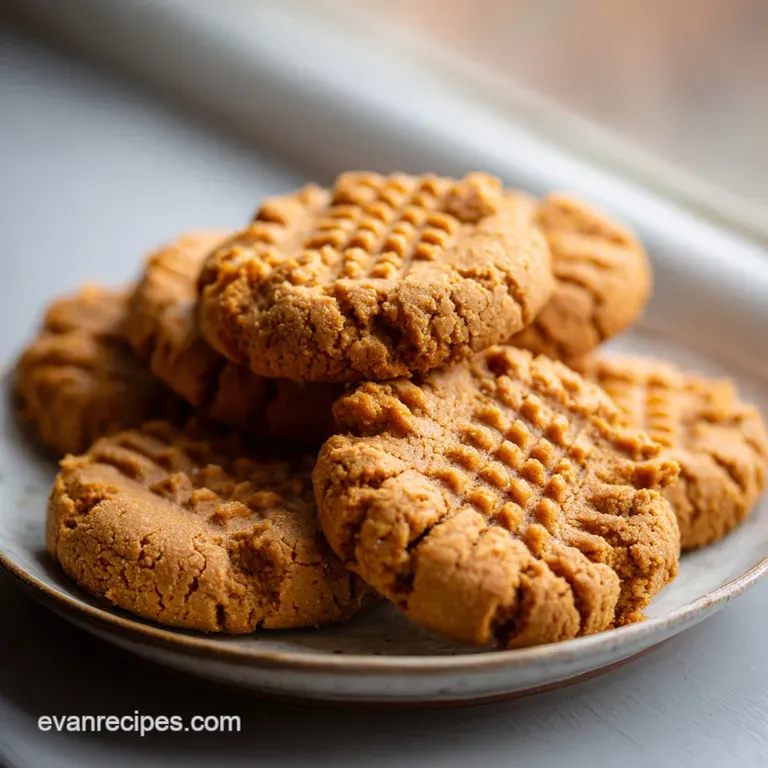
Classic Chewy Peanut Butter Cookies
- Time: Active 45 minutes, Passive 10 minutes, Total 55 minutes
- Flavor/Texture Hook: Shatter crisp edges with a velvety, roasted peanut center
- Perfect for: Family baking days, holiday gift tins, or a reliable weeknight dessert
- Crucial Recipe Specifications for Consistent Results
- The Foundation of Your Nutty Pantry Elements
- Essential Baking Gear for Your Cookie Success
- Navigating the Precision Steps for Success
- Solving Common Texture Issues and Baking Mistakes
- Creative Ways to Enhance Your Batch
- Proper Preservation Methods and Repurposing Scraps
- Flavorful Pairings for the Ultimate Tasting Experience
- Recipe FAQs
- 📝 Recipe Card
Crucial Recipe Specifications for Consistent Results
The secret to a reliable bake is understanding the mechanics behind the ingredients. In my kitchen, I’ve found that the way the sugars interact with the fats determines if your cookie is a "spreader" or a "puffer." We use a mix of white and brown sugar because they play different roles.
The white sugar helps the edges get that beautiful mahogany color and crispness, while the brown sugar thanks to its molasses content keeps the center moist and chewy. It’s a tug of-war of textures that results in the perfect bite every single time.
The Secret to the Signature Crisscross Spread The fork marks aren't just for looks; the peanut butter makes the dough very dense and fatty, so pressing it down ensures the heat reaches the center quickly for an even bake.
This physical compression helps the sugars caramelize against the hot pan, creating that contrast between the tender middle and the firm base.
- Precision Temperature: Ensure your butter is exactly 18°C–20°C. If it’s greasy to the touch, your cookies will melt into puddles.
- Weight Accuracy: Using 190g of flour prevents the cookies from becoming "cakey" or overly dry.
- Aeration Timing: Whisking the base for exactly 2 minutes creates the micro bubbles needed for a light crumb.
| Method | Total Time | Texture Outcome | Best For |
|---|---|---|---|
| Fast (No Chill) | 25 minutes | Softer, more spread | Immediate cravings |
| Classic (This Recipe) | 55 minutes | Distinct edges, deeper flavor | The gold standard texture |
| Aged (24 Hour) | 25 hours | Intense caramel notes | Ultimate gourmet batch |
Chilling the dough for 30 minutes allows the flour to fully hydrate. When you skip this, the flour doesn't have time to absorb the moisture from the egg and vanilla, often leading to a cookie that feels greasy on the palate.
Letting it rest ensures the fats solidify, giving you much better control over the final shape during the bake.
The Foundation of Your Nutty Pantry Elements
When selecting your peanut butter, stick to the shelf stable, creamy varieties for this particular recipe. While I love a natural, oil on-top peanut butter for my morning toast, the separation of oils can be a nightmare for baking consistency. A standard creamy peanut butter provides a stable emulsion that keeps the dough cohesive. If you're looking for other ways to use up that jar, you might also enjoy making peanut butter chocolate balls which use a similar flavor profile but in a no bake format.
| Ingredient | Science Role | Pro Secret |
|---|---|---|
| Peanut Butter | Provides fat and structure | Use creamy for a smoother, more velvety mouthfeel |
| Brown Sugar | Adds moisture and chew | Pack it tightly to ensure correct moisture levels |
| Baking Soda | Promotes browning/alkalinity | Sift it to avoid metallic tasting "hot spots" in the dough |
| Egg | Emulsifies fats and liquids | Room temp eggs bond faster with the creamed butter |
The fats in this recipe are a 50/50 split between butter and peanut butter. This is intentional. Pure peanut butter cookies can sometimes feel "cloying" or stick to the roof of your mouth.
The addition of 115g of unsalted butter introduces a dairy richness that lightens the texture and adds a subtle creamy note that balances the saltiness of the nuts.
The Component Breakdown
- 1 cup (250g) Creamy Peanut Butter: Why this? Provides the core flavor and essential fats for the tender crumb.
- 0.5 cup (115g) Unsalted Butter, softened: Why this? Adds a rich, buttery finish and helps the edges crisp up.
- 0.5 cup (100g) Granulated White Sugar: Why this? Essential for surface caramelization and that signature "snap."
- 0.5 cup (100g) Packed Light Brown Sugar: Why this? The molasses keeps the cookies from drying out during the bake.
- 1 Large Egg, room temperature: Why this? Acts as the "glue" that binds the proteins and fats together.
- 1 tsp Vanilla Extract: Why this? Rounds out the earthy peanut notes with a floral sweetness.
- 1.5 cups (190g) All Purpose Flour: Why this? Provides just enough gluten for structure without being tough.
- 1 tsp Baking Soda: Why this? Reacts with the brown sugar to create lift and browning.
- 0.5 tsp Baking Powder: Why this? Offers a secondary lift for a lighter, less dense cookie.
- 0.5 tsp Sea Salt: Why this? Cuts through the sugar to make the peanut flavor pop.
| Original Ingredient | Substitute | Why It Works |
|---|---|---|
| Creamy Peanut Butter | Almond Butter | Similar fat content but results in a nuttier, slightly grittier texture |
| Light Brown Sugar | Dark Brown Sugar | Adds a deeper molasses flavor; cookies will be darker and chewier |
| All Purpose Flour | 1:1 gluten-free Blend | Rice based blends work well here due to the high fat content. Note: May be more crumbly |
Essential Baking Gear for Your Cookie Success
You don't need a professional kitchen to master this bake, but a few specific tools will make your life much easier. I always recommend a heavy bottomed mixing bowl something with a bit of weight so it doesn't slide across the counter while you're whisking.
A stand mixer is great, but honestly, a sturdy hand whisk and a bit of elbow grease work just as well for the creaming stage.
Chef's Tip: To prevent the fork from sticking to the dough when making the crisscross pattern, dip the tines into a little bit of granulated sugar between every cookie. It adds a lovely sparkle and a tiny crunch to the top of the cookie.
- Large Mixing Bowl: For combining the base.
- Whisk or Electric Mixer: Essential for aerating the butter and sugars.
- Sifter: To ensure the flour and leavening agents are perfectly distributed.
- Rubber Spatula: For folding the dry ingredients without overworking the gluten.
- Baking Sheets: Two large sheets lined with parchment paper to prevent sticking.
- Wire Cooling Rack: Crucial for air circulation so the bottoms don't get soggy.
Navigating the Precision Steps for Success
- In a large mixing bowl, combine the softened butter, peanut butter, white sugar, and brown sugar. Whisk vigorously for about 2 minutes until the mixture is pale and aerated. Note: This creates the air pockets needed for a light texture.
- Add the egg and vanilla extract to the butter mixture, whisking until the batter is glossy and smooth.
- Sift the all purpose flour, baking soda, baking powder, and sea salt directly into the wet ingredients. Use a rubber spatula to fold gently until no white streaks remain.
- Cover the bowl and refrigerate the dough for 30 minutes to allow the flour to hydrate and the fats to solidify.
- Preheat your oven to 350°F (175°C) and line two large baking sheets with parchment paper or silicone mats.
- Roll the chilled dough into 1 inch balls. Place them on the baking sheets and use a small fork to press a signature crisscross pattern into each ball, slightly compressing the dough.
- Bake for 10 minutes until the edges are a mahogany color and the centers are set. Let cool on a wire rack.
Decision Shortcut for Perfect Results
- If you want a crispier cookie: Bake for 12 minutes instead of 10 and omit the baking powder.
- If you want a soft, chewy cookie: Take them out at 9 minutes and use dark brown sugar instead of light.
- If you want a thicker cookie: Increase the flour to 210g and don't press the fork marks as deep.
Solving Common Texture Issues and Baking Mistakes
Baking is a science, and even a small deviation can change the outcome. If your cookies didn't turn out quite like the ones in the picture, don't worry most issues are easy to fix. The most common mistake I see is using butter that is too soft.
If the butter is oily or melted when you start, it won't hold the air bubbles you're trying to whisk into it, resulting in a flat, greasy cookie.
Why Your Cookies Spread Too Much
This usually happens if the dough is too warm when it hits the oven. When the fats melt before the flour structure has a chance to set, the cookie collapses outward. Always ensure you do the 30 minute chill step. Another culprit could be greasing your baking sheets; use parchment paper instead.
Grease creates a slippery surface that encourages the dough to slide and spread.
Why Your Cookies Are Crumbly
If your cookies are falling apart, you likely overbaked them or used too much flour. Overbaking dries out the internal moisture, leaving the structure brittle. Remember, the cookies will continue to firm up on the hot baking sheet for a few minutes after they leave the oven.
Take them out while the centers still look a little "underdone."
| Problem | Root Cause | Solution |
|---|---|---|
| Cookies are flat | Butter was too warm or melted | Chill dough for an extra 15 minutes before rolling |
| Burnt bottoms | Oven rack was too low or dark pans | Move rack to center; use light colored aluminum pans |
| Tough texture | Overmixed the flour | Fold in dry ingredients only until just combined |
Common Mistakes Checklist
- ✓ Always use room temperature eggs to avoid "breaking" the butter emulsion.
- ✓ Never skip the sifting step; baking soda clumps can ruin a whole batch.
- ✓ Let the baking sheets cool completely between batches so the dough doesn't melt instantly.
- ✓ Check your oven temperature with a separate thermometer for accuracy.
- ✓ Measure your flour by spooning it into the cup and leveling it off, rather than scooping directly.
Creative Ways to Enhance Your Batch
Once you’ve mastered the base recipe, the possibilities are endless. I love playing with the salt levels in these. A pinch of flaky Maldon salt on top right after they come out of the oven creates a "salted peanut" vibe that is incredibly addictive. If you're a fan of rich, dense textures, you might also find that this dough makes a fantastic base for a peanut butter fudge topping if you want to turn these into a decadent bar.
Customizing the Dough
You can easily fold in 0.5 cups of mix ins during step 3. Dark chocolate chips are a classic choice, but chopped honey roasted peanuts add a fantastic crunch. Some people even like to add a teaspoon of espresso powder to the dry ingredients; it doesn't make the cookies taste like coffee, but it deepens the "roasted" flavor of the peanut butter significantly.
Scaling the Recipe
- Halving the Recipe: Use one small egg (or half a large whisked egg), 125g peanut butter, and 57g butter. Reduce bake time by 1 minute as the smaller mass in the oven may cook faster.
- Doubling the Recipe: Keep the salt and spices at 1.5x the original amount to avoid overwhelming the flavor. Work in batches so you don't overcrowd the oven.
- Freezer Batching: Roll the balls and press the fork marks, then freeze on a tray. Once solid, move to a bag. Bake directly from frozen for 12–13 minutes.
| Add in | Amount | Impact on Texture |
|---|---|---|
| Dark Chocolate Chips | 0.5 cup | Adds gooey pockets of sweetness |
| Crushed Pretzels | 0.3 cup | Increases saltiness and adds a major crunch |
| Toasted Coconut | 0.25 cup | Creates a chewy, tropical undertone |
Proper Preservation Methods and Repurposing Scraps
Storage is key if you want these to stay "fresh tasting." In an airtight container at room temperature, these cookies will stay delicious for up to 5 days. I like to put a small piece of white bread in the container; the cookies will absorb the moisture from the bread, keeping them soft for much longer.
For long term storage, the freezer is your best friend. They thaw beautifully in about 20 minutes on the counter.
Zero Waste Kitchen Tips If you end up with a few cookies that got a little too crispy or are a couple of days old, don't throw them away! You can crush them up to make a spectacular pie crust for a cheesecake or a chocolate tart.
Alternatively, fold the crumbs into vanilla ice cream for a "homemade peanut butter crunch" treat. Even the crumbs at the bottom of the jar can be saved to top your morning oatmeal.
- Fridge: Store dough for up to 3 days. Baked cookies stay fresh for 1 week.
- Freezer: Dough balls last 3 months. Baked cookies last 2 months.
- Reheating: 10 seconds in the microwave makes them taste "just out of the oven" gooey.
Debunking Kitchen Myths
One big misconception is that you must use natural peanut butter for the "best" flavor. In reality, the stabilizers in commercial peanut butter are what give these cookies their iconic velvety crumb. Another myth is that you can't overmix cookie dough.
While it's not as sensitive as cake batter, overworking the flour once it's added will develop the gluten, making your cookies tough and bread like rather than tender and flaky.
Flavorful Pairings for the Ultimate Tasting Experience
While a glass of ice cold milk is the undisputed champion of pairings, there are other ways to enjoy these. If you're serving them for a dinner party, try making "sandwich cookies" by putting a layer of raspberry jam or chocolate ganache between two cookies.
The acidity of the jam cuts through the richness of the peanut butter perfectly.
For a more sophisticated pairing, try serving these alongside a cup of dark roast coffee or a smoky Earl Grey tea. The tannins in the tea balance the sweetness, while the nutty notes of the cookie complement the roasted coffee beans.
If you’re feeling adventurous, a small glass of tawny port or a nutty bourbon can also be a surprising but delightful match for a late night treat.
Ultimately, this peanut butter cookie recipe is about the joy of a tested, reliable classic. It’s a recipe that works because it respects the science of fats and sugars while keeping the process simple enough for a busy afternoon.
Whether you like them with extra salt, chocolate chips, or just the pure, unadulterated flavor of roasted peanuts, these are bound to become a staple in your baking rotation. Happy baking!

Recipe FAQs
What are the three ingredients in peanut butter cookies?
This is a common misconception. A proper bakery style cookie requires a balance of fats, sugars, and structure; our recipe uses peanut butter, butter, white sugar, brown sugar, an egg, vanilla, flour, baking soda, baking powder, and sea salt to achieve the correct mahogany edges and tender center.
Is it true Snoop Dogg has a specific peanut butter cookie recipe?
No, this recipe is distinct. Our process focuses on precise aeration of butter and sugar for 2 minutes to create a specific, light crumb structure that differentiates it from celebrity style versions.
What are common peanut butter cookie mistakes?
Overworking the dough and skipping the chill time. If you don't refrigerate for 30 minutes, the fat will melt too quickly, causing the cookies to spread into thin puddles rather than maintaining their intended structure. If you enjoyed the dough handling techniques used here, you will find they apply perfectly to other dense cookie recipes.
Which cookies are good for diabetics?
Standard cookie recipes are generally not suitable. Because this recipe requires specific ratios of white and brown sugar to reach the necessary mahogany color and chewy texture, it is not formulated for diabetic dietary restrictions.
How to ensure my cookies have that signature crisscross pattern?
Press the dough balls down firmly using the back of a small fork. This physical compression is essential because the high fat content in peanut butter makes the dough dense; pressing it ensures the heat penetrates evenly for a consistent bake.
How to store these cookies to keep them fresh?
Place them in an airtight container at room temperature once fully cooled. To keep them for longer, you can freeze the rolled dough balls for up to 3 months and bake them straight from the freezer whenever you need a fresh batch.
How to tell if the cookies are finished baking?
Remove them from the oven once the edges turn a distinct mahogany color. At the 10-minute mark, the centers should appear set, indicating the ideal balance between a crisp exterior and a soft, velvety middle.
Classic Chewy Peanut Butter Cookies

Ingredients:
Instructions:
Nutrition Facts:
| Calories | 159 kcal |
|---|---|
| Protein | 3.7 g |
| Fat | 9.4 g |
| Carbs | 16.4 g |
| Fiber | 0.8 g |
| Sugar | 10.5 g |
| Sodium | 151 mg |
