Bisquick Chicken Pot Pie Recipe
- Time: Active 10 minutes, Passive 30 minutes, Total 40 minutes
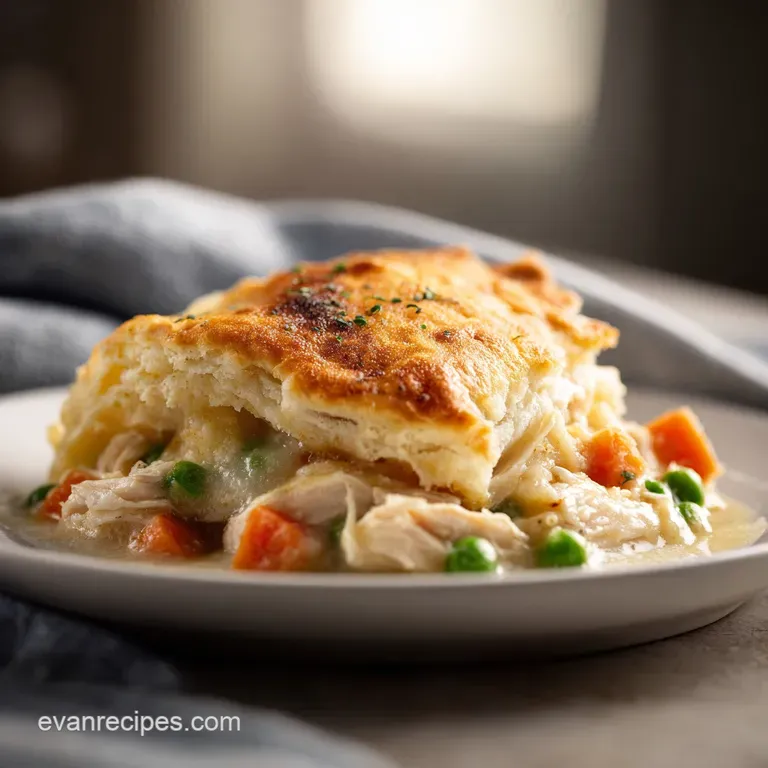
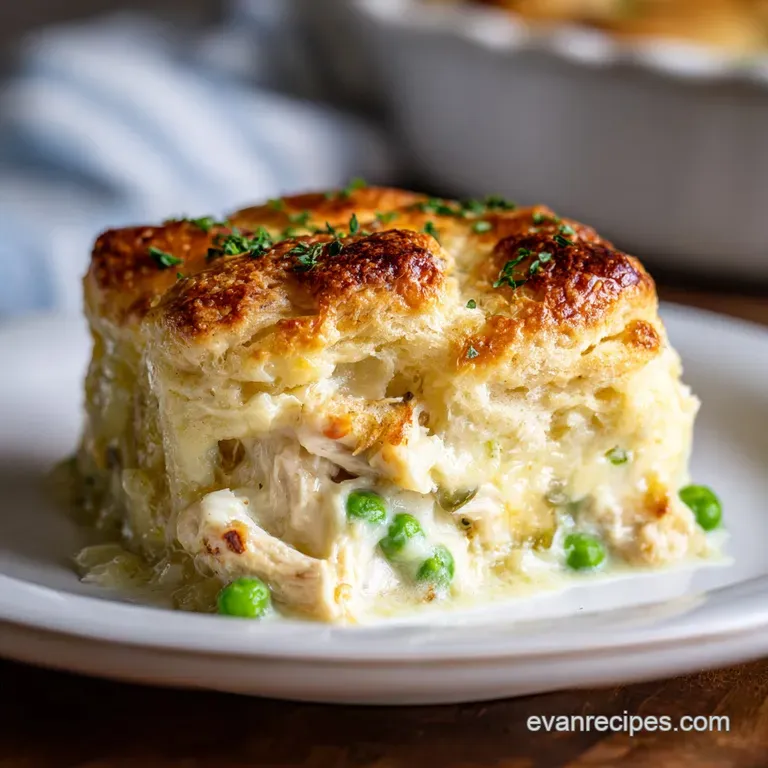
- Flavor/Texture Hook: Fluffy, golden brown topping over a velvety, herb infused filling
- Perfect for: Busy weeknight dinners or simple family-friendly comfort food
- The Reason This Hearty Casserole Always Wins
- Essential Numbers for Your Next Family Dinner
- A Close Look at Our Simple Pantry Staples
- The Basic Tools for a Golden Bake
- Master the Steps for a Perfectly Flaky Finish
- Professional Solutions for a Golden Crust and Filling
- Smart Ways to Customize Your Savory Filling
- Keeping Leftovers Fresh and Using Every Scrap
- Simple Ways to Make Every Serving Look Great
- Kitchen Myths Debunked
- Recipe FAQs
- 📝 Recipe Card
The Reason This Hearty Casserole Always Wins
The secret to this recipe isn't just convenience; it's the specific way the ingredients interact to create layers of texture. Most people think of a pot pie as a heavy, dense affair, but the Bisquick mix changes the game by introducing a lighter crumb that absorbs just enough of the savory steam from below.
- Steam Management: The topping acts as a porous lid, allowing excess moisture to escape while the milk and soup mixture thickens into a velvety sauce.
- Leavening Lift: Adding a whole egg to the Bisquick topping creates a structured rise that prevents the crust from sinking into the filling.
- Flavor Suspension: Garlic powder and thyme are suspended in the fats of the condensed soup, ensuring every bite is seasoned from the inside out.
| Method | Time | Texture | Best For |
|---|---|---|---|
| Oven Bake | 30 minutes | Crisp, golden brown top with a fluffy interior | Traditional family dinners |
| Stovetop (Skillet) | 20 minutes | Softer, dumpling style topping | Ultra fast weeknight solutions |
| Individual Ramekins | 22 minutes | High crust to filling ratio with extra crunch | Impressing guests or portion control |
The comparison above shows why the oven is usually my go to for that classic finish. While the stovetop is faster, you lose that specific golden brown "shatter" on the topping that makes a bisquick chicken pot pie so iconic.
If you're in a massive rush, the skillet method works, but the texture will be closer to chicken and dumplings than a traditional pie.
Essential Numbers for Your Next Family Dinner
When you're cooking for a crowd, or just a very hungry family, knowing exactly how much you need prevents that "not enough for seconds" panic. This recipe is designed to be hearty enough that a single serving is genuinely satisfying, especially when paired with a light side.
| Servings | Ingredient Adjustments | Pan Size | Cook Time |
|---|---|---|---|
| 2-3 People | Half all ingredients (use 1 small egg) | 8 inch round | 25 minutes |
| 6 People | Follow standard recipe exactly | 9 inch pie plate | 30 minutes |
| 12 People | Double all ingredients (2.5x spices) | 9x13-inch pan | 40 minutes |
Chef Note: If you're doubling the recipe for a larger crowd, I suggest only using 1.5x the salt and spices initially. Flavors tend to concentrate in larger batches, and you can always add a pinch more pepper at the end if it needs a boost.
A Close Look at Our Simple Pantry Staples
Understanding what each component does helps you become a better cook. We aren't just throwing things in a bowl; we're building a structural masterpiece of comfort food. For instance, the way the fats in the butter interact with the starch in the Bisquick is what gives you that "melt in-your mouth" feeling.
| Component | Science Role | Pro Secret |
|---|---|---|
| Original Bisquick | Provides starch and leavening for the structural "lid" | Whisk it alone first to break up any clumps |
| Condensed Soup | Acts as an emulsified base that holds the filling together | Use "Cream of Chicken with Herbs" for a flavor shortcut |
| Large Egg | Binds the topping and helps it brown via the Maillard reaction | Ensure it's room temperature for a higher rise |
| Melted Butter | Adds richness and creates a tender, flaky crumb | Brush a little extra on top 5 minutes before finishing |
The condensed soup is the workhorse here, providing a thick, stable sauce that doesn't break under high heat. If you're looking for other ways to use creamy bases in quick meals, you might see similar techniques in our Chicken Enchiladas recipe, where the sauce provides that essential velvety texture.
The Basic Tools for a Golden Bake
You don't need fancy gadgets for this dish. A simple 9 inch glass pie plate is my favorite because you can see if the bottom of the crust is setting, but a ceramic dish or even a cast iron skillet works brilliantly.
- 9 inch Pie Plate: Standard size for this recipe; ensures the filling is deep enough to stay moist.
- Whisk: Essential for getting the lumps out of the Bisquick topping.
- Large Mixing Bowl: You'll need space to fold the frozen veggies into the chicken without making a mess.
- Silicone Spatula: Great for scraping every last drop of the velvety filling into the dish.
Master the Steps for a Perfectly Flaky Finish
1. Build the Foundation
Preheat your oven to 400°F (200°C). In your ungreased 9 inch pie plate, combine the 2 cups cooked chicken, 12 oz frozen mixed vegetables, 10.5 oz condensed soup, 0.75 cup milk, and your spices (thyme, garlic powder, pepper).
Note: Mixing directly in the dish saves on washing up and keeps the filling compact.
2. Level the Filling
Spread the mixture evenly across the bottom of the plate. Cook 1 minute on high in the microwave if your vegetables are still rock solid frozen; this jump starts the heating process so the filling is bubbling when the top is golden.
3. Construct the Topping
In a separate small bowl, stir together the 1 cup Bisquick mix, 0.5 cup milk, and 1 large egg until just combined. Note: Don't overmix here or the topping will become tough instead of fluffy.
4. The Pour and Level
Pour the topping mixture over the chicken filling, spreading it to the edges with a spoon. It will look thin, but trust the process it expands significantly in the oven.
5. The Golden Bake
Bake for 30 minutes until the topping is a deep golden brown and the filling is bubbling around the edges. If the top is pale, it's not done yet.
6. The Butter Finish
Five minutes before the timer goes off, drizzle the 2 tbsp melted salted butter over the top. This creates that professional, glossy finish and adds a final hit of salt.
7. The Rest Period
Remove from the oven and let it sit for 5 minutes. Note: This allows the sauce to thicken slightly so it doesn't run all over the plate when served.
8. Final Garnish
Sprinkle a little fresh parsley or extra cracked pepper over the top for a pop of color before bringing it to the table.
Professional Solutions for a Golden Crust and Filling
Sometimes things don't go perfectly, and that's okay. The most common issue with any pot pie is the balance between a cooked top and a hot center. If your oven runs hot, you might find the top browning before the middle is steaming.
Why Your Topping Sinks
If your Bisquick layer disappears into the chicken mixture, it usually means the filling was too watery or the topping wasn't thick enough. Make sure you measure the 0.5 cup milk for the topping accurately.
| Problem | Root Cause | Solution |
|---|---|---|
| Soggy Bottom | Frozen veggies released too much water | Thaw and pat dry, or increase bake time by 5 mins |
| Doughy Center | Oven temperature was too low | Use a thermometer to ensure it's at a true 400°F |
| Pale Topping | Missing the egg or butter wash | Brush with melted butter and broil for 60 seconds |
If you're finding that you love the speed of these "dump and bake" style meals but want something with a different flavor profile, you can apply similar time saving logic to our Chicken Stir Fry recipe, which also focuses on getting dinner ready in under 30 minutes.
Common Mistakes Checklist
- ✓ Don't use "Heart Smart" Bisquick unless you add an extra tablespoon of butter; it lacks the fat needed for the "shatter" texture.
- ✓ Never skip the egg in the topping; it provides the structure that keeps the biscuit layer from becoming a pancake.
- ✓ Avoid over stirring the filling once it's in the pan; you want distinct pockets of chicken and veg.
- ✓ Ensure the oven is fully preheated before the dish goes in to get an immediate lift on the topping.
- ✓ Resist the urge to peek; opening the oven door drops the temp and can cause the topping to fall.
Smart Ways to Customize Your Savory Filling
This recipe is incredibly forgiving. If your family isn't big on peas and carrots, you can swap them out for almost anything as long as the volume stays the same. The key is to keep the moisture levels consistent.
| Original Ingredient | Substitute | Why It Works |
|---|---|---|
| Cream of Chicken Soup | Cream of Mushroom or Celery | Provides the same thick, velvety base with a different earthy note. |
| Cooked Chicken | Leftover Turkey or Canned Chicken | Same protein density. Note: Turkey is slightly drier, so add 1 tbsp extra milk. |
| Whole Milk | Half and Half | Creates an even richer, more decadent sauce for special occasions. |
| Frozen Mixed Veg | Sautéed Leeks and Mushrooms | Adds a more "grown up" flavor profile while maintaining bulk. |
Keeping Leftovers Fresh and Using Every Scrap
Pot pie is actually one of those rare dishes that might taste even better the next day because the herbs have more time to infuse into the chicken.
Storage: Keep any leftovers in an airtight container in the fridge for up to 3 days. When reheating, I highly suggest using the oven or an air fryer at 350°F rather than the microwave.
The microwave will make the topping soft, whereas the dry heat of an oven will bring back some of that original crunch.
Freezing: You can freeze the unbaked filling (chicken, veg, soup, spices) in a freezer bag for up to 3 months. I don't recommend freezing the Bisquick topping, as the leavening agents lose their power.
When you're ready to eat, thaw the filling, put it in the dish, and whip up a fresh batch of the topping.
Zero Waste: If you have leftover rotisserie chicken, don't throw away the carcass! Boil it down with some onion scraps and celery ends to make a homemade stock that you can use instead of milk in the filling for an even deeper chicken flavor.
Simple Ways to Make Every Serving Look Great
Even a humble weeknight meal deserves to look appetizing. Since this is a "homestyle" dish, you don't need to go overboard with tweezers and microgreens.
- The Individual Touch: If you have small ceramic ramekins, bake individual portions. It gives everyone their own "crust territory" and looks like something from a cozy bistro.
- Color Contrast: A sprinkle of fresh chives or even a dash of paprika over the golden crust makes the colors pop against the white cream sauce.
- The Clean Scoop: Use a large serving spoon to get deep into the dish, ensuring everyone gets a good mix of the fluffy top and the velvety bottom.
Kitchen Myths Debunked
Myth: You have to cook the vegetables before adding them to the pie. Truth: In this recipe, the 30 minute bake time at 400°F is more than enough to cook frozen vegetables to a perfect tender crisp. Pre cooking them often leads to a "mushy" filling that lacks texture.
Myth: Searing the chicken first "seals in" the juices. Truth: Searing doesn't seal juices, but it does create a Maillard reaction which adds a savory depth. Since we are using pre cooked chicken here, that work is already done.
If you are using raw chicken, you must cook it first, not to seal in juice, but to ensure food safety and develop flavor.
Myth: Adding more milk makes the topping fluffier. Truth: Excess liquid actually weighs down the Bisquick mix. Stick to the 0.5 cup ratio for the topping. The "fluff" comes from the reaction between the leavening in the mix and the egg, not the volume of liquid.
Right then, you're all set to make a bisquick chicken pot pie that will actually have your family asking for seconds. It's simple, it's hearty, and it works every single time. Trust me, once you see that golden crust emerge from the oven, you'll wonder why you ever bothered with frozen boxed versions.
Let's crack on and get that oven preheated!

Recipe FAQs
Can I make the filling ahead of time and assemble later?
Yes, assemble up to 24 hours ahead. The filling can be fully prepared and cooled; simply store it covered in the refrigerator. Wait to pour the Bisquick topping over it until just before baking to ensure maximum lift and flakiness.
How to get the Bisquick topping to be light and fluffy, not dense?
Mix the topping ingredients gently until just combined. Overmixing develops the gluten in the flour, leading to a tough, heavy crust. If you are interested in mastering dough handling for lighter results, see how the same principles apply in our Butter Pecan Cake recipe, which benefits from minimal mixing.
Is it true you must bake this recipe straight from the refrigerator?
No, room temperature topping yields a better rise. While the filling should be chilled or cold, the topping mixture should be made immediately before pouring. Allowing the topping batter to sit for five minutes helps activate the leavening agents for better oven spring.
How to adapt this recipe for a lower fat meal?
Substitute half the milk with water and use low-sodium soup. You should still use the full amount of butter on top for texture, but reducing the milk in the base cuts fat significantly. If you enjoy leaner cooking methods, explore our Slow Cooker Turkey recipe for low-fat protein options.
Why does my filling always seem runny after baking?
The filling lacked sufficient heat or wasn't reduced enough. Ensure the filling is bubbling hot before the topping goes on, and bake until the edges visibly bubble vigorously. This residual heat helps the condensed soup fully thicken and set the sauce.
What is the best way to achieve a golden brown, crispy top crust?
Brush the topping with melted butter five minutes before the end of baking. This adds necessary fat to promote the Maillard reaction and ensures a rich, golden hue without burning the edges.
Can I use raw chicken instead of cooked chicken in this dish?
No, you must use pre-cooked chicken. Raw chicken requires a much longer cooking time than the 30 minutes needed for the Bisquick topping to bake correctly. If you are starting with raw meat, cook it thoroughly first, or consider a similar recipe that accommodates raw protein, like our Sausage and Egg recipe, which bakes longer.
Bisquick Chicken Pot Pie

Ingredients:
Instructions:
Nutrition Facts:
| Calories | 328 kcal |
|---|---|
| Protein | 22.8 g |
| Fat | 14.1 g |
| Carbs | 27.4 g |
| Fiber | 2.2 g |
| Sugar | 5.3 g |
| Sodium | 745 mg |
