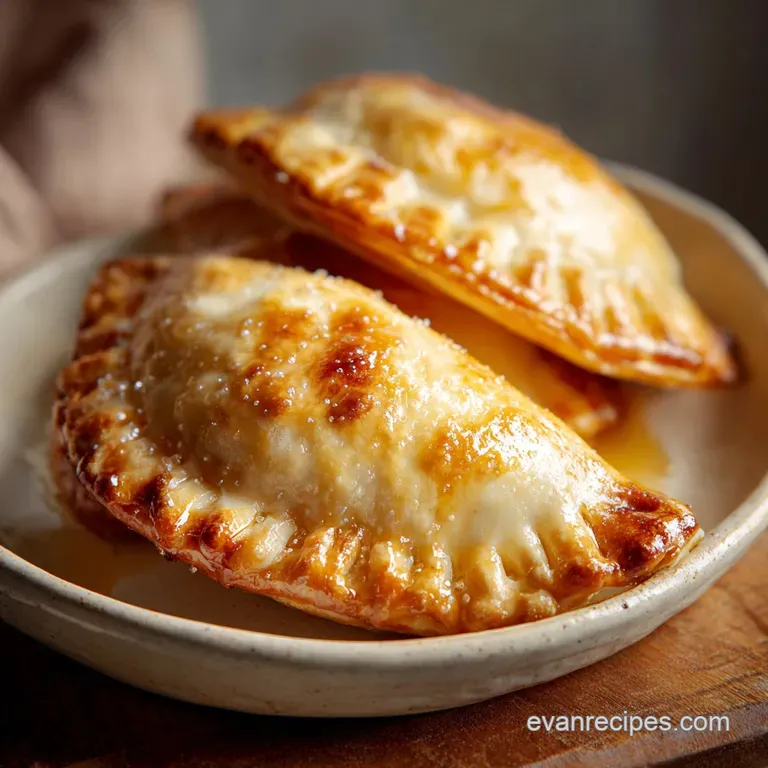
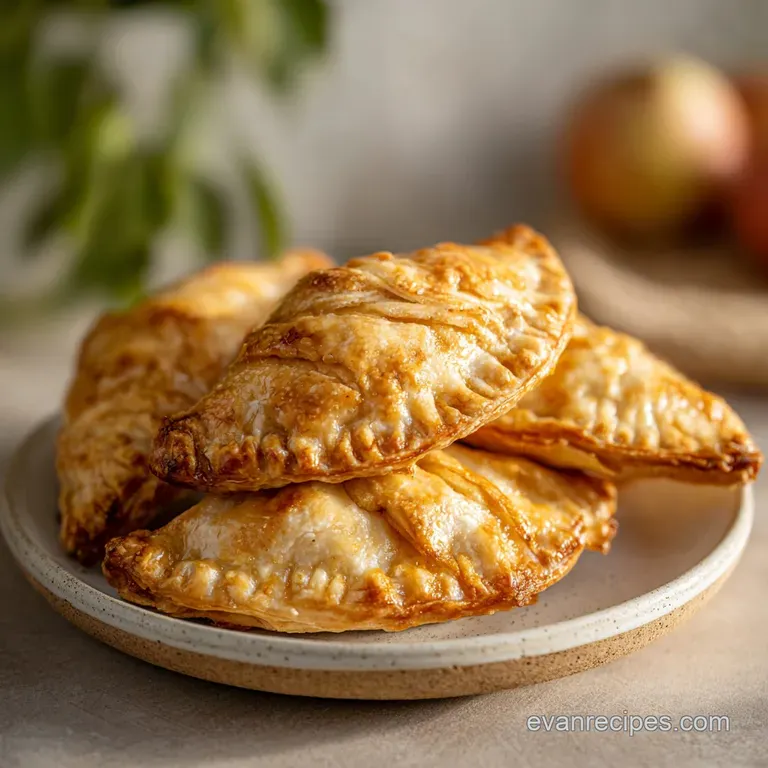
Apple Hand Pies with Buttery Crust
- Time: Active 25 minutes, Passive 25 minutes, Total 50 minutes
- Flavor/Texture Hook: Shatter crisp buttery crust with warm, cinnamon spiced apple centers
- Perfect for: Fall picnics, lunchbox treats, or a low stress holiday dessert
- Mastering the Ultimate Apple Hand Pies
- The Physics of Flaky Crust
- Recipe Yield and Time Metrics
- Selecting the Best Elements
- Necessary Gear for Success
- Instructions for Golden Pockets
- Solving Common Baking Issues
- Creative Filling Ideas
- Scaling for Larger Crowds
- Truths About Pastry Baking
- Storage and Kitchen Efficiency
- Perfect Side Pairings
- Recipe FAQs
- 📝 Recipe Card
Mastering the Ultimate Apple Hand Pies
I still remember the first time I tried to bake these. I was headed to a lakeside picnic and thought I could just toss raw, sliced apples into some dough and hope for the best. Big mistake. Halfway through the drive, I opened the container to find a literal lake of apple juice at the bottom.
The crusts hadn't just gotten soft; they had turned into sad, wet napkins. It was a disaster, but it taught me the single most important rule of fruit filled pastry: you have to control the moisture before it controls you.
Since that soggy afternoon, I have spent years refining the balance between a crisp, buttery shell and a filling that stays exactly where it belongs. The secret isn't just in the dough, though a good chill helps. It is all about the "fry down" of the fruit.
By simmering those diced apples in butter and sugar first, you concentrate the sugars and cook off the excess water. When you take that first bite, you get a distinct snap of pastry followed by a thick, velvety apple center. No leaks, no mess, just pure handheld bliss.
We are going for a specific contrast here: the bright, tart punch of the Granny Smith apples against the rich, salty depth of a well baked crust. It is a masterclass in textures. You want that mahogany finish on the outside that sounds like dry leaves crunching when you bite in.
Trust me, once you master the pre cook method, you will never go back to the "dump and bake" style again. Let's get into how we make that happen.
The Physics of Flaky Crust
The Secret to the Crunch: Pre cooking the filling gelatinizes the starches and evaporates excess water, preventing the "steam room" effect that softens pastry from the inside out. This ensures the bottom stays crisp while the top remains flaky.
| Method | Time | Texture | Best For |
|---|---|---|---|
| Traditional Oven | 25 minutes | Ultra flaky, deep mahogany | Classic results and large batches |
| Air Fryer | 12 minutes | Very crunchy, slightly drier | Quick snacks or solo servings |
| Deep Fried | 6 minutes | Bubbled, blistered, greasy good | Fair style indulgence |
It is worth noting that while the air fryer is fast, it often lacks the even browning you get from a 180°C (350°F) oven. For the most reliable rise and that specific "shatter" we are after, the oven is your best friend.
Recipe Yield and Time Metrics
Precision is the difference between a good bake and a masterpiece. When making Apple Hand Pies, we need to respect the cooling times just as much as the heat. If you rush the filling and put it into the dough while it is still warm, the fat in the pastry will melt instantly, and you'll lose every single layer you worked for.
| Component | Science Role | Pro Secret |
|---|---|---|
| Granny Smith Apples | Structure and Acid | High pectin keeps them from turning to mush |
| Cornstarch Slurry | Viscosity Control | Always mix with cold water to prevent lumps |
| Egg Wash | Maillard Reaction | Adds protein to the surface for a shiny, dark crust |
| Brown Sugar | Hygroscopic Sweetness | Draws out apple moisture for a thicker syrup |
Beyond the chemistry, you need to watch your dough thickness. I aim for exactly 1/8 inch. Any thicker and the pastry feels doughy in the middle; any thinner and it won't have the structural integrity to hold the fruit.
Selecting the Best Elements
We use specific quantities to ensure the ratio of fruit to pastry is balanced. You don't want a mouthful of plain dough, but you also don't want the pies to burst at the seams.
- 500g Granny Smith or Honeycrisp apples: Peeled and diced small (about 1/4 inch cubes). Why this? Small cubes pack tighter, leaving fewer air pockets in the pie.
- 65g light brown sugar: Packed firmly. Why this? Molasses notes add depth that white sugar lacks.
- 14g unsalted butter: To sauté the fruit.
- 1 tsp ground cinnamon: For that classic aroma.
- 0.25 tsp ground nutmeg: Adds a woody, complex spice profile.
- 1 pinch salt: Crucial for balancing the sugar.
- 5g cornstarch + 15ml water: The thickening agent.
- 5ml lemon juice: Prevents browning and brightens the flavor.
- 450g refrigerated pie crust or puff pastry: Keep this ice cold until the last second.
- 1 large egg + 15ml water: The wash for that golden shine.
- 25g coarse sanding sugar: For texture and sparkle.
If you are feeling extra adventurous with your spice cabinet, you can swap the cinnamon and nutmeg for a pre mixed Apple Pie Spice recipe. It saves a bit of measuring and usually includes a touch of ginger or allspice which adds a lovely warmth to the back of the throat.
| Original Ingredient | Substitute | Why It Works |
|---|---|---|
| Granny Smith Apples | Honeycrisp or Braeburn | These stay firm. Note: Avoid Red Delicious; they turn to mush. |
| Cornstarch | Tapioca Starch | Provides a clear, glossy sheen. Best for freezing. |
| Brown Sugar | Coconut Sugar | Earthy, toasted flavor. Note: Slightly less sweet than brown sugar. |
Necessary Gear for Success
You don't need a high tech kitchen to master these, but a few specific tools make the process much smoother. A heavy bottomed skillet is non negotiable for the filling; thin pans can scorch the sugar before the apples soften.
- Large Skillet: For pre cooking the filling.
- Rolling Pin: To even out the store-bought dough.
- 3 inch to 4 inch Round Cutter: Or a sharp knife and a square template.
- Baking Sheet: Lined with parchment paper.
- Pastry Brush: For the egg wash.
- Fork: To crimp the edges (the classic look!).
I personally prefer a heavy marble rolling pin because the weight does the work for me, and the cold stone helps keep the pastry fat from melting. If your kitchen is warm, you might even want to pop your rolling pin in the fridge for ten minutes before you start.
Instructions for Golden Pockets
Simmering the Concentrated Filling
In a large skillet over medium heat, melt the 14g of butter. Add the 500g of diced apples, 65g of brown sugar, cinnamon, nutmeg, salt, and 5ml of lemon juice. Stir occasionally until the apples are tender but still hold their shape, which usually takes about 5 to 8 minutes.
Thickening the Sauce
Whisk the 5g of cornstarch with 15ml of cold water in a small bowl until smooth. Pour this slurry into the bubbling apple mixture. Stir constantly for about 1 minute until the liquid turns translucent and thick. Remove from heat and let it cool completely.
Note: Using warm filling will ruin the pastry layers.
Preparing the Pastry Base
Unroll your 450g of pie crust or puff pastry on a lightly floured surface. If using pie crust, roll it slightly thinner to about 1/8 inch. Cut out 10 circles or squares, roughly 4 inches wide. If the dough gets soft, slide it onto a tray and chill it for 10 minutes.
Assembling the Portable Pockets
Place about 1 to 2 tablespoons of the cooled apple mixture onto the center of each pastry piece. Don't overfill! Brush the edges lightly with the egg wash (1 egg beaten with 15ml water) to act as glue. Fold the dough over the filling to create a half moon or rectangle.
Sealing the Edges
Press the edges together firmly with your fingers, then use a fork to crimp the border. This isn't just for looks; it creates a mechanical seal that prevents the filling from blowing out in the oven. Transfer the assembled pies to your parchment lined baking sheet.
Baking to Mahogany Perfection
Cut two small slits in the top of each pie to allow steam to escape. Brush the tops generously with the remaining egg wash and sprinkle with the 25g of coarse sanding sugar. Bake at 180°C (350°F) for 25 minutes until the crust is deep golden and the filling is bubbling.
Final Cooling
Let the pies rest on the baking sheet for at least 10 minutes. This allows the internal starches to set fully so the filling doesn't run out when you take your first bite. The bottom should be firm and dry to the touch.
Solving Common Baking Issues
Why Your Crust Leaked
It is incredibly frustrating to pull a tray out and see half the filling on the parchment. This usually happens because the steam had nowhere to go, or the seal wasn't tight enough. If the steam builds up, it will find the weakest point usually the side seam and burst through.
| Problem | Root Cause | Solution |
|---|---|---|
| Soggy Bottom | Filling was too wet or too hot | Pre cook filling and cool to room temp before assembly. |
| Exploding Seams | No steam vents or poor crimping | Cut larger slits on top and use egg wash to glue edges. |
| Pale Crust | Oven temp too low or no egg wash | Use 180°C (350°F) and don't skip the egg wash for browning. |
Why Your Pastry is Tough
Overhandling the dough is the enemy of flakiness. If you re roll the scraps too many times, the gluten develops and the fat melts into the flour rather than staying in distinct pockets. Work quickly and keep everything cold.
Common Mistakes Checklist:
- ✓ Ensure the filling is completely cold before it touches the dough.
- ✓ Don't skip the slits on top; steam needs an escape route.
- ✓ Crimp with a fork twice once on each side if necessary for a double strength seal.
- ✓ Use a thermometer to check your oven; many run 10-20 degrees off.
- ✓ Avoid overfilling; 1.5 tablespoons is usually the limit for a 4 inch pie.
Creative Filling Ideas
While the classic apple is king, you can easily tweak this base. If you want a more "bakery style" feel, try adding 30g of chopped toasted pecans to the filling for a bit of crunch. The nuttiness pairs beautifully with the brown sugar and cinnamon.
Another popular tweak is the "Salted Caramel" version. Simply drizzle a teaspoon of caramel over the apple mound before sealing the pie. If you go this route, be even more diligent with your crimping, as caramel becomes very thin and runny when hot. For a great pairing, you can even serve these with a side of Caramel Apple Dip recipe for double the decadence.
Scaling for Larger Crowds
If you need to make 20 or 30 of these for a bake sale or party, scaling is straightforward but requires some logistics.
- Scaling Up (2x or 3x): You can double the filling recipe easily. However, only increase the spices (cinnamon/nutmeg) by 1.5x to avoid them becoming overpowering. Work in batches when assembling so the dough doesn't sit out at room temperature for too long.
- Scaling Down (1/2): If you only want 5 pies, use a small egg for the wash or just use a splash of milk. Reducing the filling is simple, but watch the pan carefully as a smaller amount of liquid evaporates faster and can scorch.
Chef's Tip: If you are making a massive batch, freeze the assembled (unbaked) pies on a tray for 30 minutes before bagging them. You can then bake them straight from the freezer just add about 5 to 7 minutes to the total bake time.
Truths About Pastry Baking
One of the biggest myths is that you need to use butter only crust for flavor. While butter is delicious, a mix of butter and shortening (or using a high-quality store-bought refrigerated crust) often provides better structural stability for hand held treats.
The shortening has a higher melting point, which helps those crimped edges hold their shape during the initial blast of heat.
Another misconception is that "more filling is better." In a standard pie, you have deep walls to hold the fruit. In a hand pie, the dough is the only thing keeping it together. Overfilling leads to thin spots in the pastry that will inevitably tear. Less is truly more when it comes to portable desserts.
Storage and Kitchen Efficiency
These pies are best the day they are made, but they store surprisingly well if handled correctly. Keep them in an airtight container at room temperature for up to 2 days. For longer storage, the fridge will keep them for 5 days, though the crust will lose some of its "shatter."
- Freezing: You can freeze baked pies for up to 3 months. Wrap them individually in plastic wrap and then foil.
- Reheating: Avoid the microwave! It will turn the pastry into a rubbery mess. Reheat in a 175°C (350°F) oven for 8 to 10 minutes to bring back the crispness.
- Zero Waste: Don't throw away those apple peels! Toss them with a little sugar and cinnamon and bake them at a low temp (120°C / 250°F) until crispy for a quick "apple chip" snack while the pies are in the oven.
Perfect Side Pairings
These Apple Hand Pies are plenty rich on their own, but they play well with others. A sharp cheddar cheese slice on the side is the old-fashioned way to eat apple pie, and the salty sharp contrast is incredible. If you prefer things sweet, a scoop of vanilla bean ice cream is the classic choice.
For something a bit more refined, try serving them alongside a warm Custard Bread Pudding recipe during a winter brunch. The textures of the creamy pudding and the crunchy hand pie create a really interesting dessert plate that feels much fancier than it actually is. Whatever you do, make sure you have a napkin nearby those flaky layers are messy in the best way possible.

Recipe FAQs
Should I pre-cook the apple filling for the hand pies?
Yes, absolutely cook the apples first. Pre-cooking concentrates the sugars and evaporates excess water, which prevents the crust from becoming soggy during baking.
How to assemble the hand pies to prevent leakage?
Cool the filling completely and seal the edges thoroughly. Place only 1 to 2 tablespoons of cooled filling, brush the edges with egg wash to act as glue, press firmly, and then crimp with a fork for a secure mechanical seal.
What is the ideal thickness for the pastry dough?
Roll the dough to exactly 1/8 inch thickness. Any thicker risks a doughy center, and any thinner compromises the structural integrity needed to contain the filling.
How to ensure the pastry crust achieves a crisp, shattering texture?
Bake at the correct temperature with an egg wash. Use a 180°C (350°F) oven for approximately 25 minutes and brush the tops generously with an egg wash for enhanced browning and shine.
Is it true that I must use Granny Smith apples for the best flavor?
No, but firm apples are necessary. Granny Smiths offer great structure and tartness, but Honeycrisp or Braeburn apples also work well; avoid softer varieties like Red Delicious, which turn to mush.
How should I reheat leftover hand pies?
Reheat in the oven, never the microwave. Place them in a 175°C (350°F) oven for 8 to 10 minutes to revive the crispness of the buttery crust.
What is the purpose of cutting slits in the top of the hand pies?
Cut slits to allow steam to escape the filling. Without vents, internal steam pressure builds up and will force the filling out through the weakest part of the pastry seal.
Apple Hand Pies Recipe
Ingredients:
Instructions:
Nutrition Facts:
| Calories | 285 kcal |
|---|---|
| Protein | 3.1 g |
| Fat | 14.2 g |
| Carbs | 37.5 g |
| Fiber | 1.8 g |
| Sugar | 16.4 g |
| Sodium | 215 mg |
